Integration Setup
Follow these steps to set up your Target Plus integration.
Step 1: Navigate to 'New Integration' screen
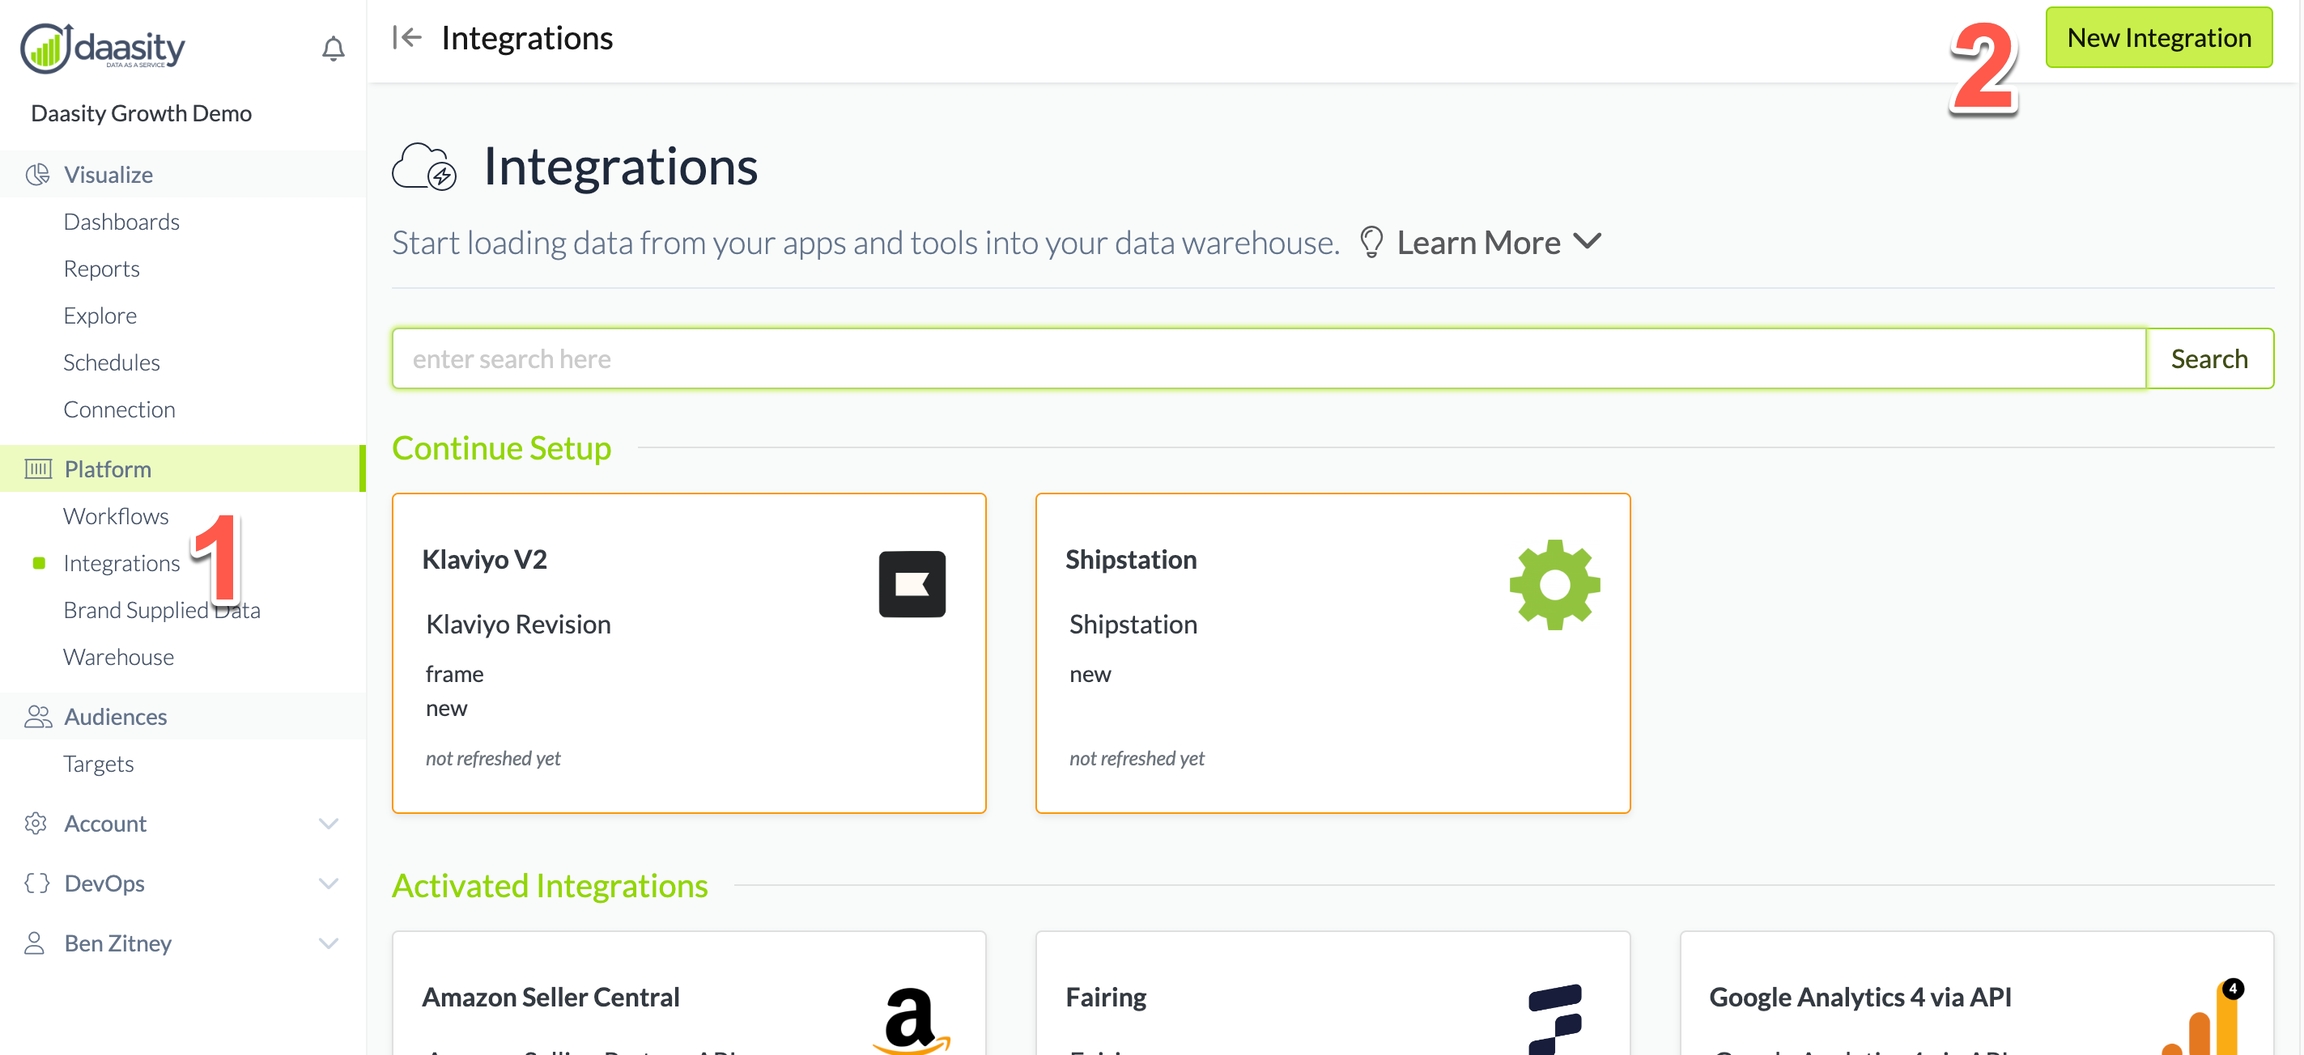
In the Daasity app, click Integrations in the left-hand menu, and then the New Integration button in the upper-right corner.

Step 2: Choose the Target Plus integration
In the search box, type "target" and choose the Target Plus integration.

Step 3: Name the integration
Give the integration a name. This is the name that will be displayed in your integrations list in the Daasity app.

Step 4: Authorize the integration
To give Daasity access to your Target Plus data for extraction, you'll need to generate a Seller Id, Seller Token, and API Key through the Target Plus portal and then enter them in the appropriate fields.

Seller ID
Log into plus-portal.target.com
Navigate to Business Info -> Basic Info
Copy the SMS ID value and use this value for your Seller ID
API Key
In plus-portal.target.com, navigate to Partner Settings -> API Tokens
Click the blue pencil edit button on the right side of the screen
Create a new API token, copy the value, and use this for your API Key
Seller Token
Navigate to developer.target.com
Navigate to API Management -> Apps and Keys
Click the large red "+" in the upper right
Generate a new seller token and use this in the Daasity app
Step 5: Save the integration
Step 6: Load history
From the integration details screen, trigger a load of up to 5 years of history:

This will load your historical data into your database.
When we have transformation code developed for this integration, the data will show in your order-based reporting the following day. Currently while this is in beta, it will only load raw data into your data warehouse.
Was this helpful?