Integration Setup

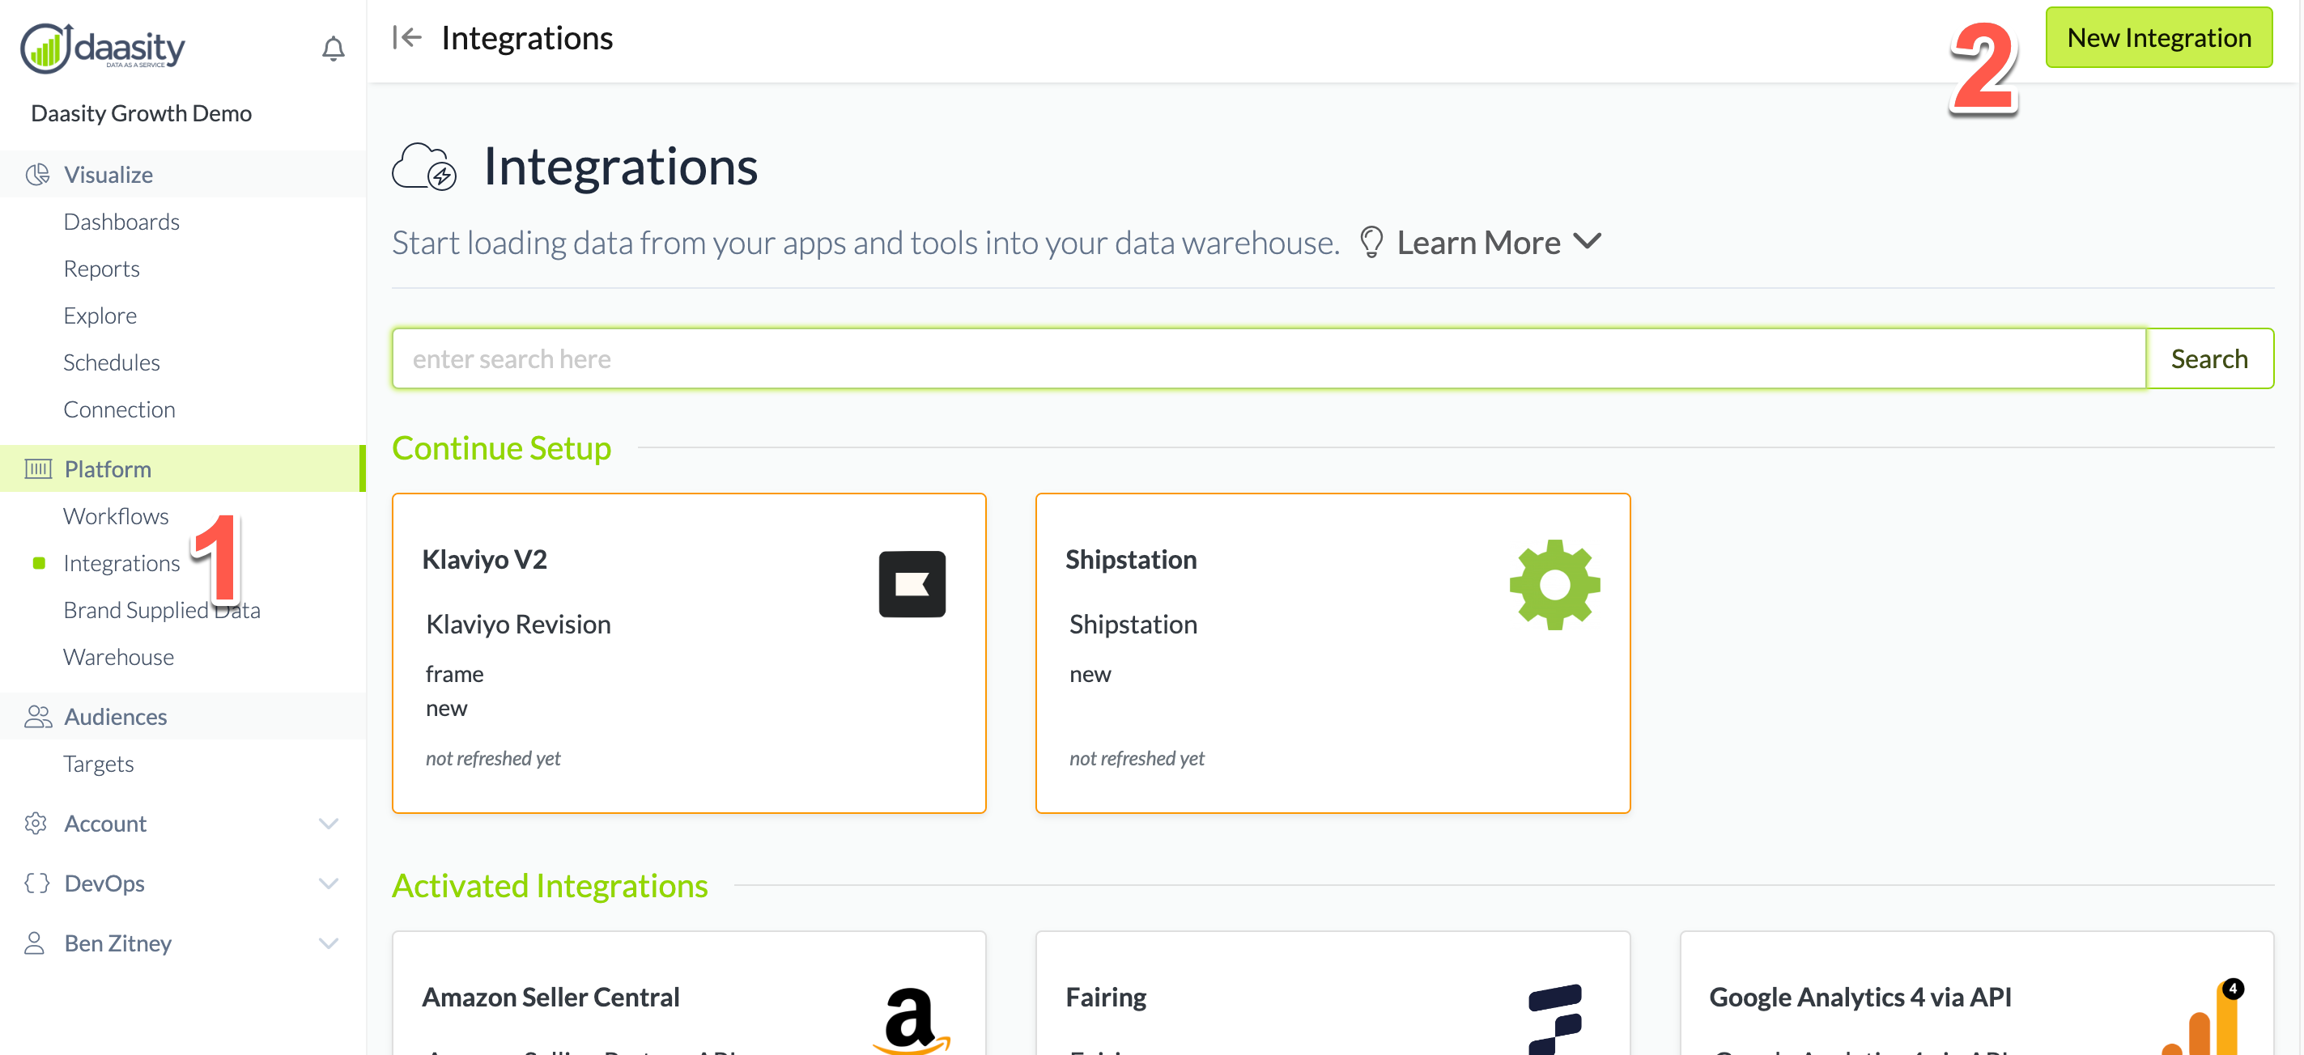
Step 1: Navigate to 'New Integration' screen

In the Daasity app, click Integrations in the left-hand menu, and then the New Integration button in the upper-right corner.

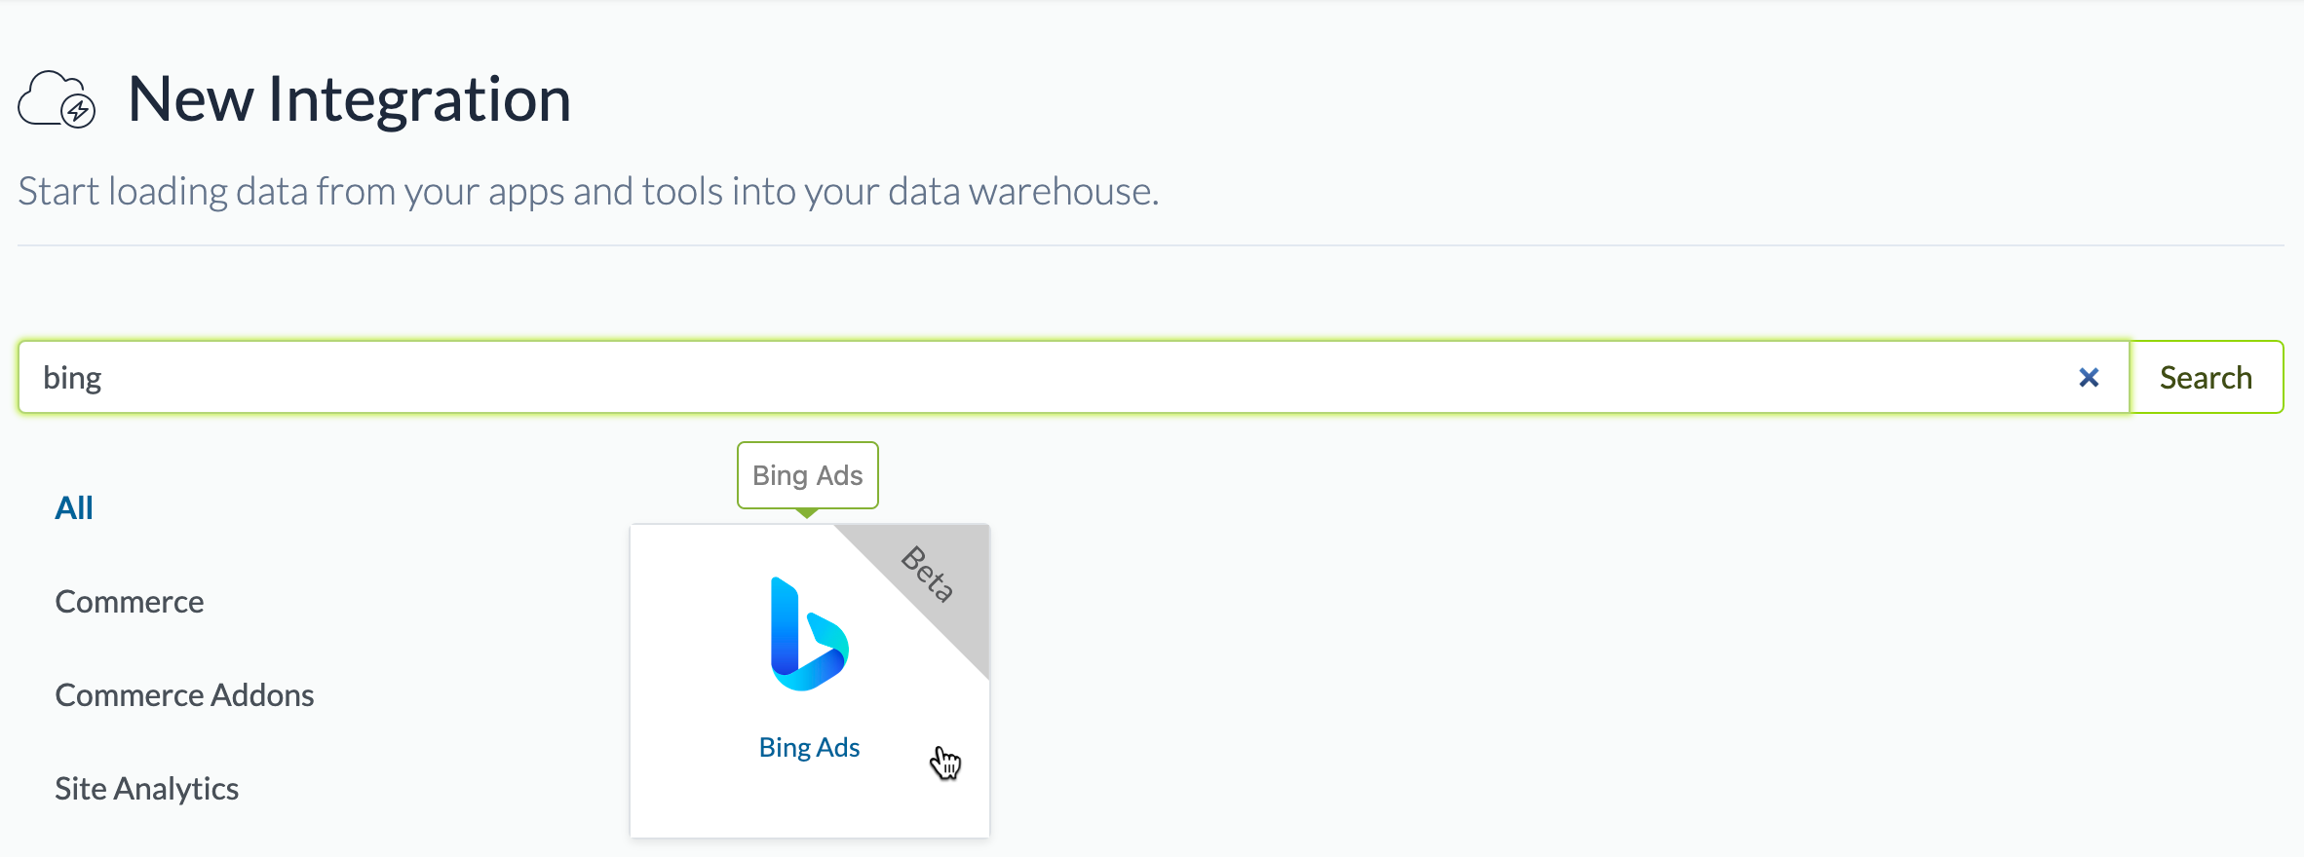
Step 2: Choose the Bing Ads integration

In the search box, type "bing" and choose the Bing Ads integration.

Step 3: Name the integration

Give the integration a name. This is the name that will be displayed in your integrations list in the Daasity app.

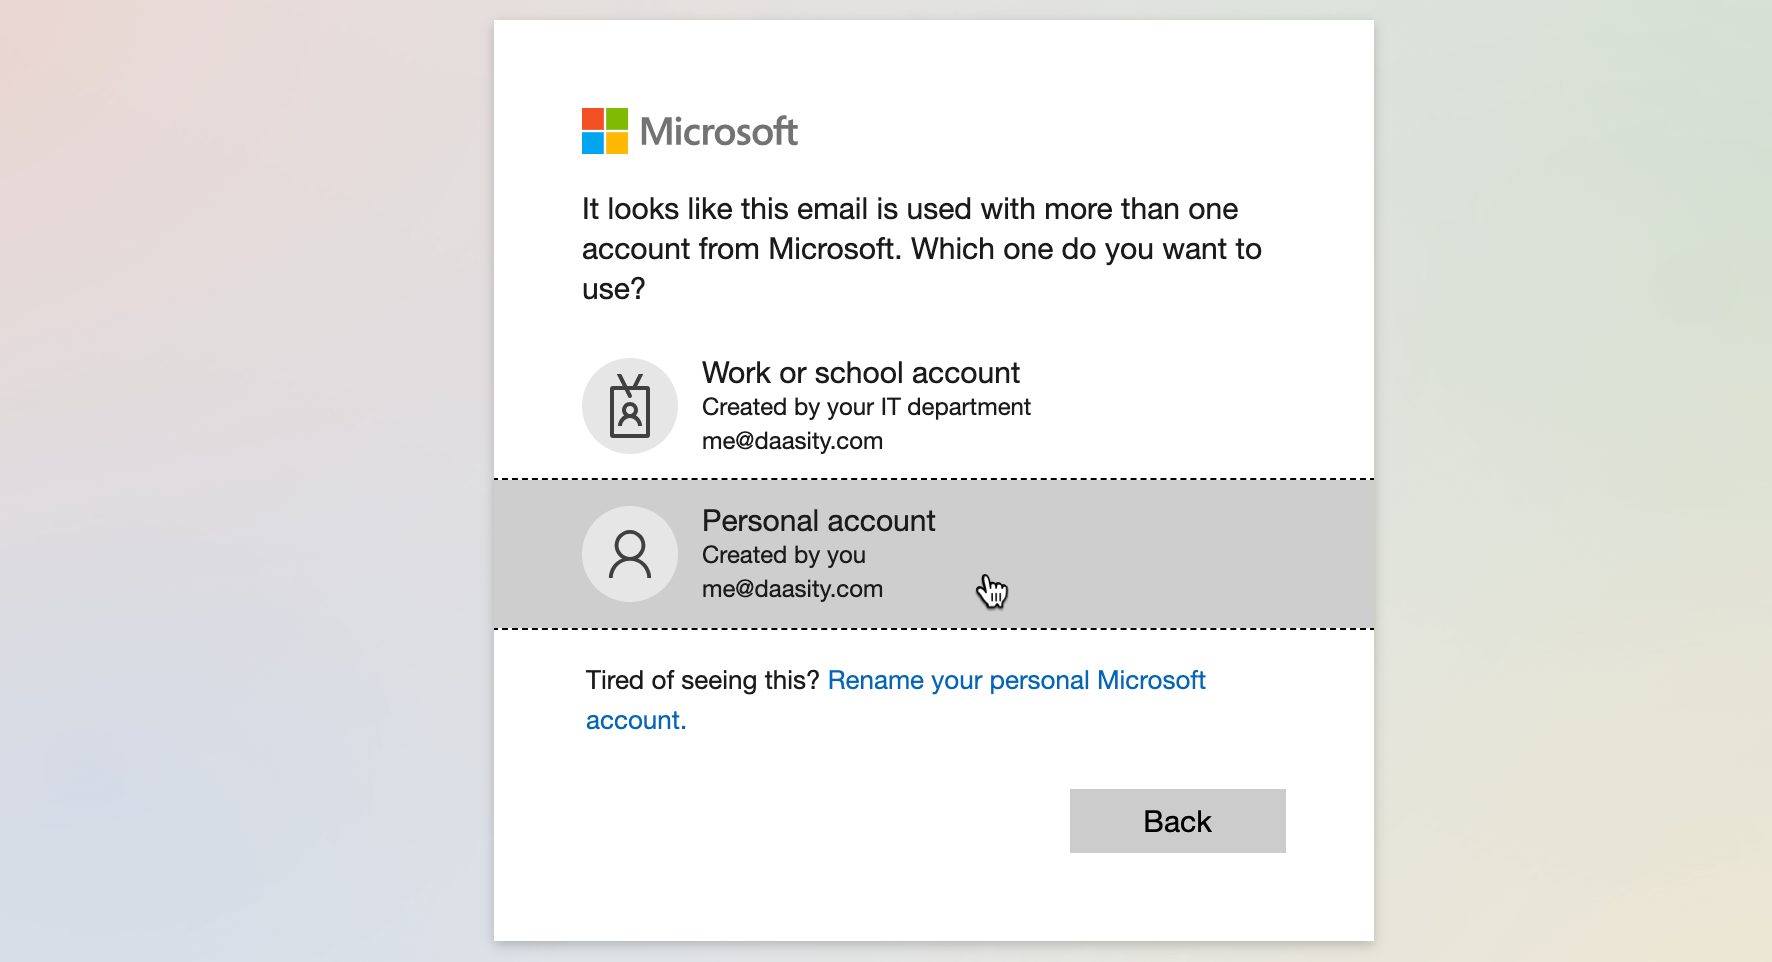
Step 4: Authorize the integration

Click the Authorize button to begin the authorization process:

This will transition you to the Microsoft account picker. You need to choose a personal account that has access to the Microsoft Ads account that you want to use for the integration:

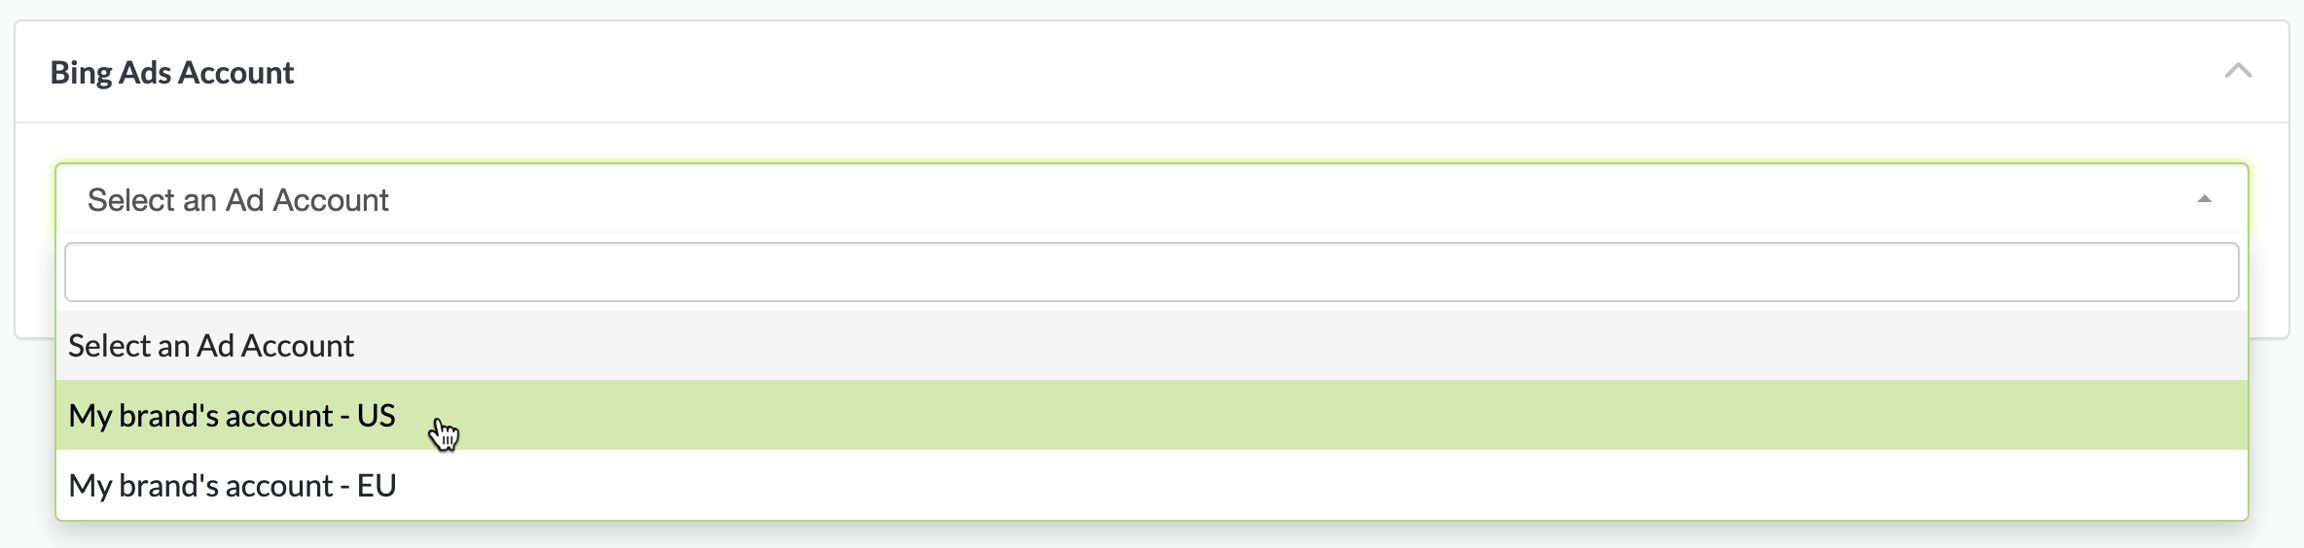
Step 5: Choose an ad account
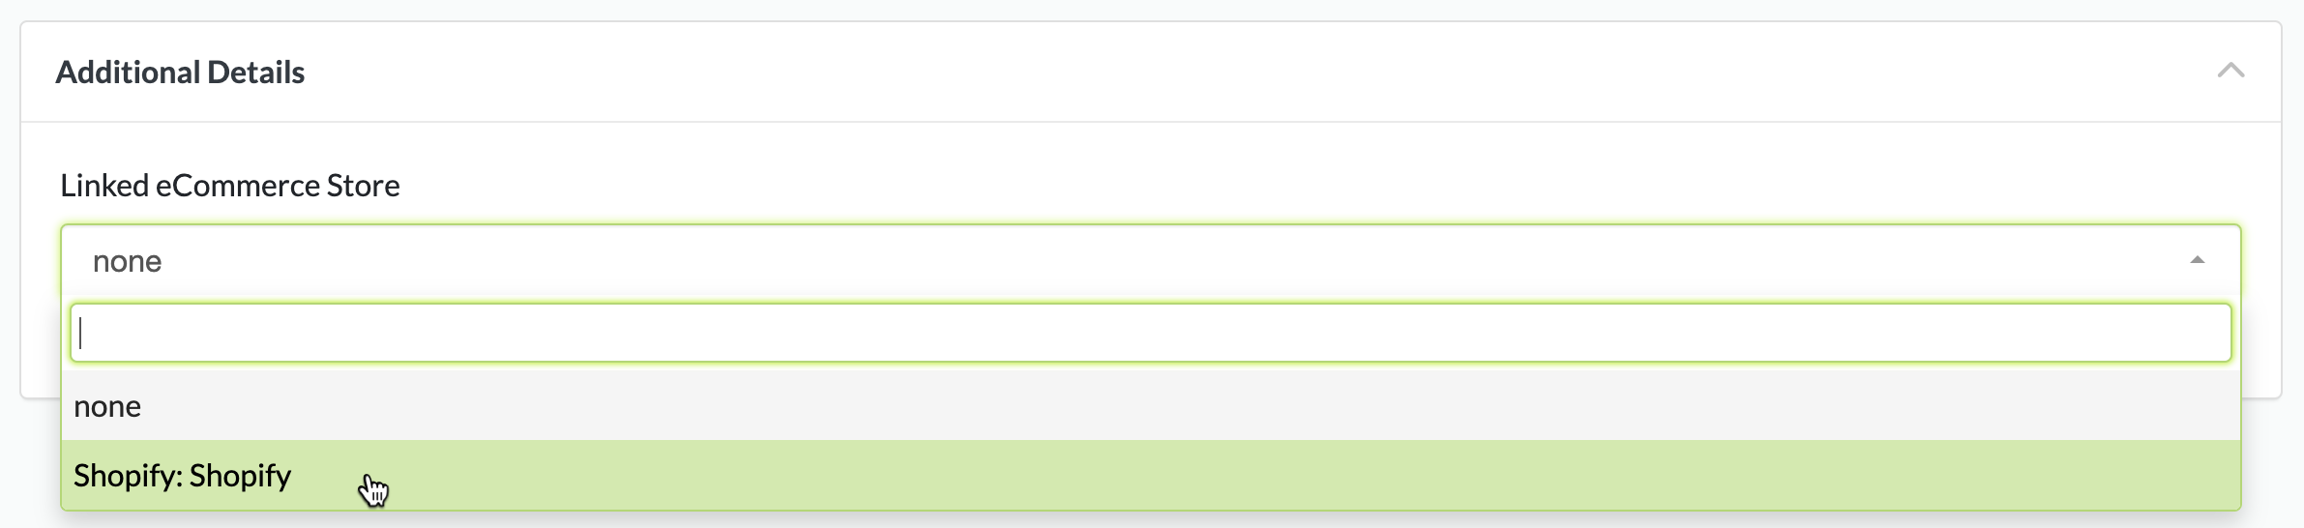
Since you may have access to multiple Bing Ads accounts, you now need to use the dropdown to choose which one to use for this integration:

Select which of your Shopify stores this Bing Ads account drives traffic to:

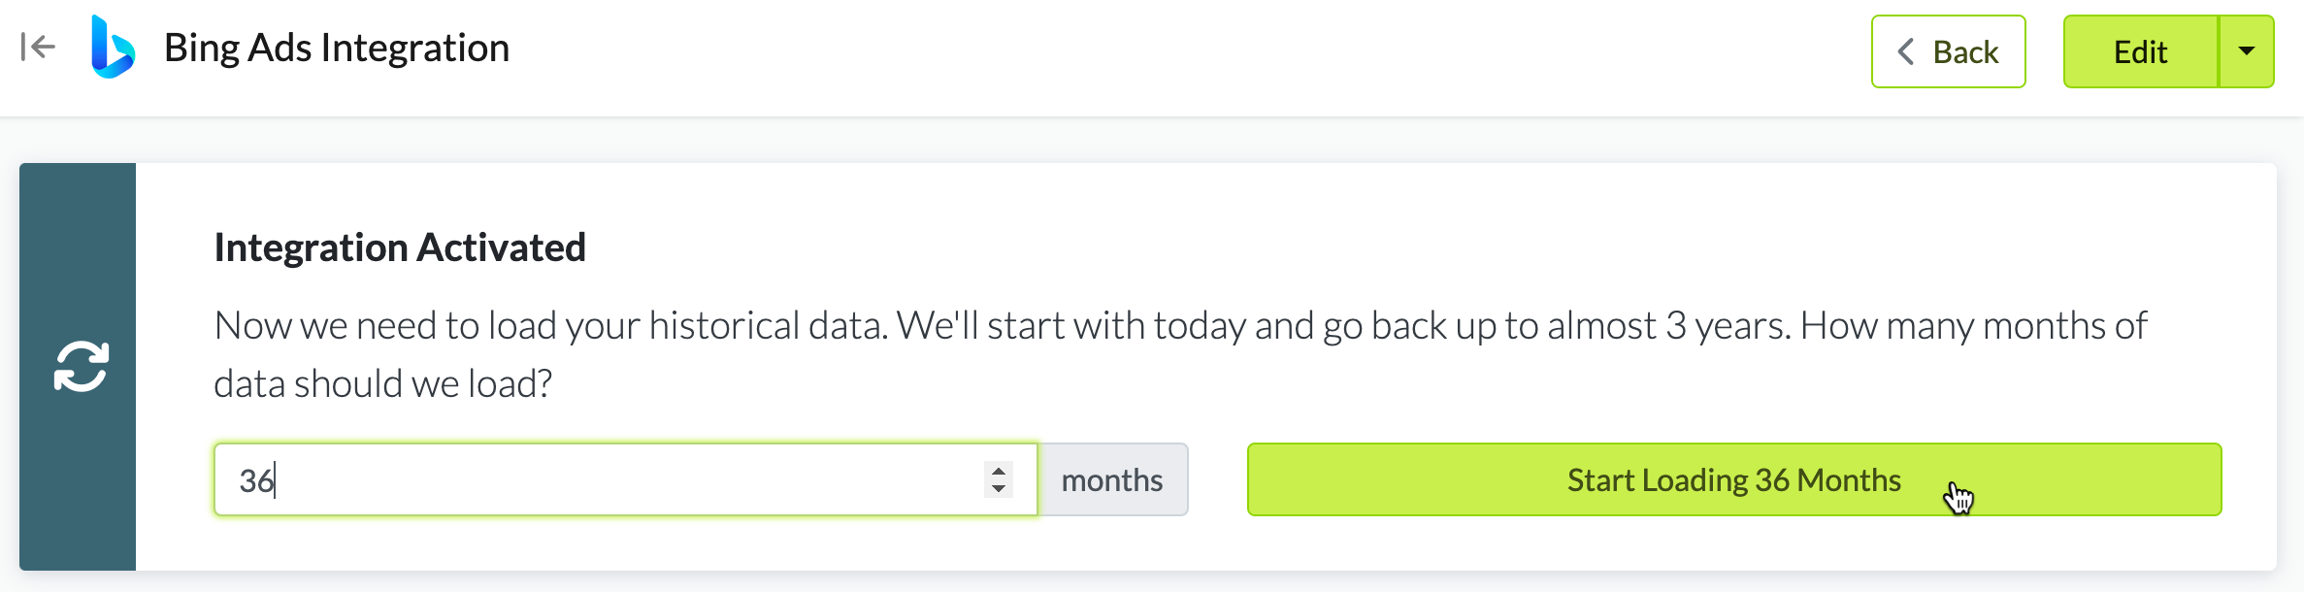
Step 5: Load history

You can load a max of 3 years' history

The Bing Ads reporting API only makes data available from the past 3 years. As a result, the most history you can load is 3 years' worth.

From the integration details screen, trigger a load of up to 3 years of history:

Last updated

Was this helpful?