Integration Setup

This page will help you setup ShipBob for the first time, and provide instructions for recurring data updates as needed.

Step 1: Navigate to 'New Integration' screen
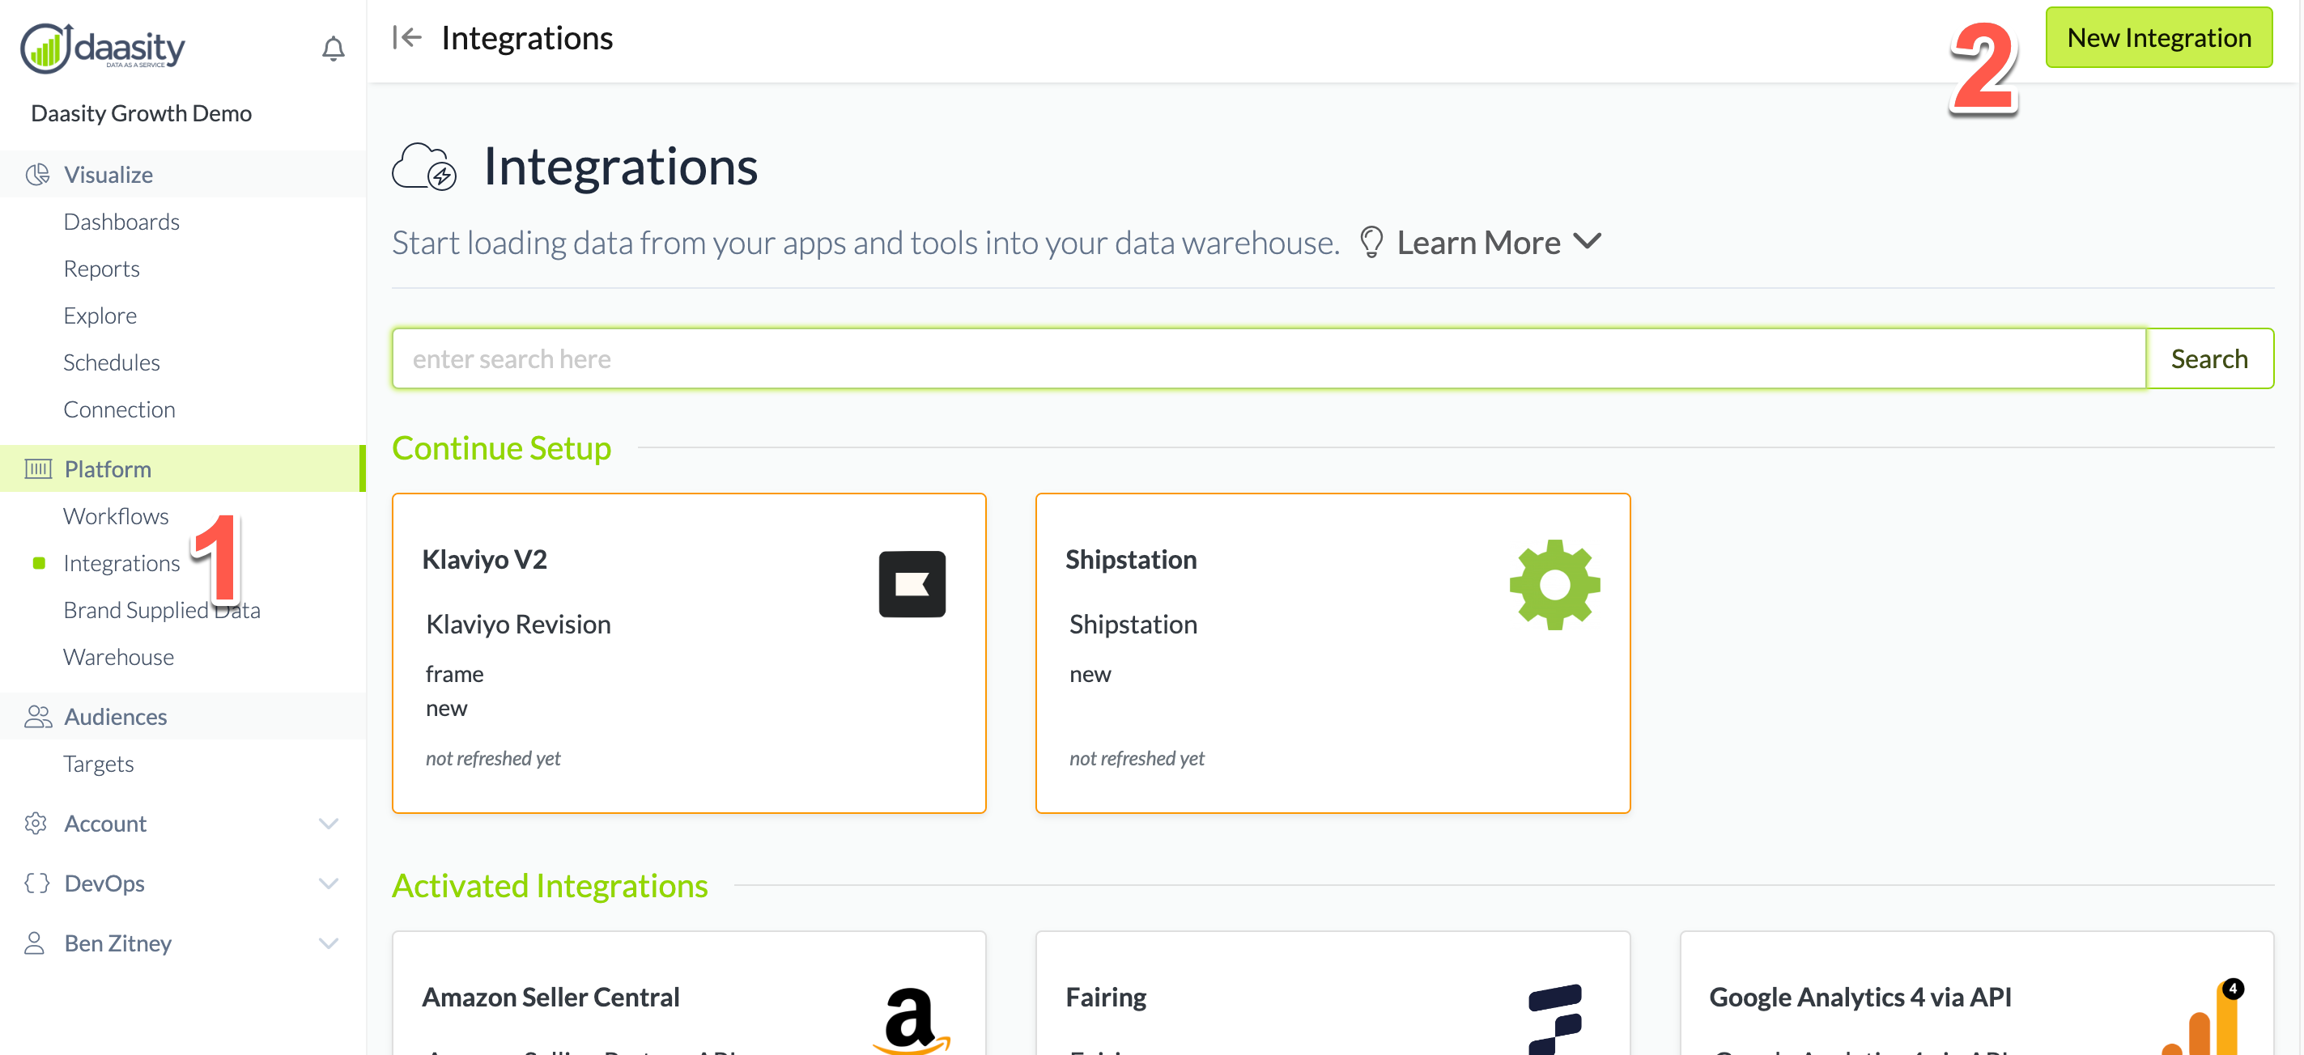
In the Daasity app, click Integrations in the left-hand menu, and then the New Integration button in the upper-right corner.

Step 2: Choose the ShipBob integration

In the search box, type "shipbob" and choose the ShipBob integration.

Step 3: Name the integration

Give the integration a name. This is the name that will be displayed in your integrations list in the Daasity app.

Step 4: Enter your access token

You will need to generate a Personal Access Token from your ShipBob dashboard. Copy the Personal Access Token, and add it to the Access token field. Then, click the Create button in the upper-right of the screen.

Step 5: Load history

From the integration details screen, trigger a load of up to 5 years of history:

Last updated