Creating a Custom Report
This outlines the steps to load data using a custom query from your GA4 BigQuery data into your data warehouse.
Please keep in mind that running a query on your BigQuery data using a custom report will impact your BigQuery usage, which you may get billed for (depending on the complexity of the query and the amount of data you are querying). Be cautious to not create queries that are unnecessarily complex or query an unnecessarily large amount of data. Aim to be as efficient as possible, and monitor your Google Cloud Platform costs.
Why Create a Custom Report?
When you set up your Google Analytics 4 (Via Big Query) integration, there is a set of standard reports that Daasity will load from your BigQuery into your warehouse that mimic our standard API-based reports. If you want to report on anything outside of those standard reports using your BigQuery data, you will need to create a custom report.
Steps for Creating a Custom Report
Step 1: Create & validate your query in BigQuery
In your BigQuery console, create the query that will produce the results you want pulled into your Daasity data warehouse.
Keep in mind that by default this data will be pulled each day, shortly after midnight. Because of the timing, the previous day's data may not yet be loaded into its own daily table yet, and may only exist in its intraday form. Learn more about full-day tables versus intraday tables here.
Here's a simple example of a query that you might want to load from BQ into your data warehouse daily:
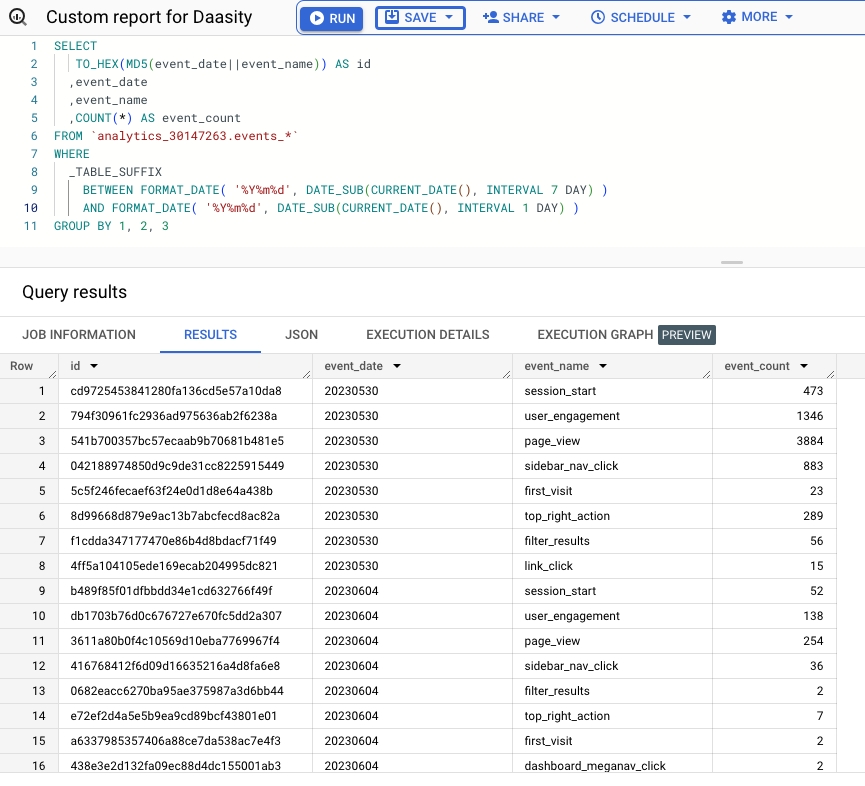
Step 2: Save your query as a view in BigQuery
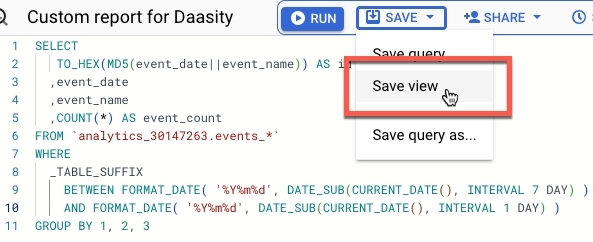
From the SAVE menu, choose Save view:
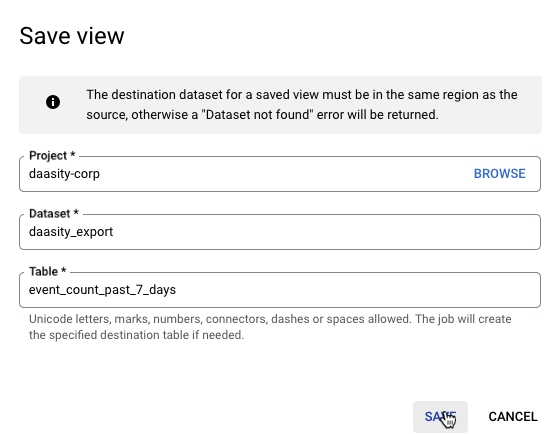
Choose an appropriate Dataset (the dataset must already exist) and Table name, and click SAVE:
Validate that the view shows up in your left-hand nav:

Note: If you are not able to create a new view, it may be an issue with your permissions. Contact your GCP administrator if this is the case.
Step 3: Create a new integration in the Daasity App
Note: These instructions assume that you have already created a BigQuery Datasource integration that connects to your GA4 BigQuery dataset.
Navigate to the Integrations page, click New Integration, and select the Big Query Database integration:
Fill in the settings as follows:
Datasource = The pre-existing BigQuery Data Source integration you should have already set up that grants Daasity access to your BigQuery tables
Source Schema = The name of the dataset you chose in Step 2
Source Tablename = The name of the table you chose in Step 2
Destination Schema = The data warehouse schema that you want this data loaded into in your Daasity data warehouse
Destination Tablename = The table in the data warehouse that you want this data loaded into in your Daasity data warehouse
Action = The method you choose to load data daily from the source to the destination. See hint text in the integration setup screen in the Daasity app for more details
SQL Query = A
SELECT *statement referencing the view you created in Step 2.An example would be:
SELECT * FROM daasity_export.event_count_past_7_days
Once you have completed all these fields, click Create.
Step 4 (Optional): Set a sync key for the destination table
If you chose Update/Insert in the Action setting in Step 3, you will need to specify which field(s) should be used as the sync key for updating/inserting records into the destination table. The sync key should be an id you generated in the query, or a combination of fields that constitute a unique id. Whether you choose a single field or a combination of fields, the components of the sync key should be unique.
Currently only our development team members are able to set a sync key for these tables — you can't define them in the UI. This requires you to send an email to [email protected] with the following details:
A link to the integration that you are setting up
Details on which field(s) should be used for the sync key
Step 5: Load data and validate
You can either (A) wait for the nightly extract and load to run, and check that the data successfully loaded the next morning, or (B) trigger a load directly from the integration settings page after setting it up.
To trigger a load directly from the integration settings page, open the Edit menu in the upper right, and click History Load:
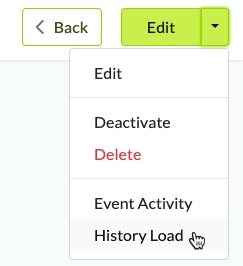
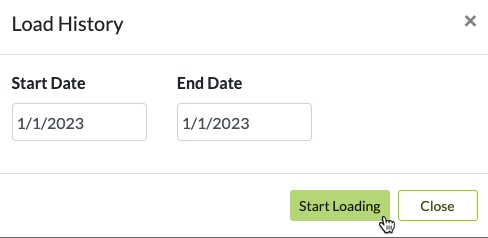
You can choose any date range from the Load History window. (The history load will not actually load these dates, because you are not dynamically passing any date information into the integration.) Once you choose a date range, click Start Loading:
To check if data was successfully loaded, you can (A) check the destination table that you defined in Step 3 or (B) check the Event Activity.
You can access the Event Activity from the Edit menu in the upper right of your screen:
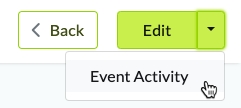
If your data load completed successfully, there will be a Query message in the Event Activity table showing how many records were loaded:

Was this helpful?