The LookML Development Workflow

The development lifecycle follows a strict path from branch creation to production deployment. This process ensures your changes are validated and tested before they affect your production dashboards.

1. Navigate to Analytics Development

To begin, navigate to the Analytics Development section via the gear icon.

2. Initialize Development Mode

Click the Enable development mode button to activate your staging environment.

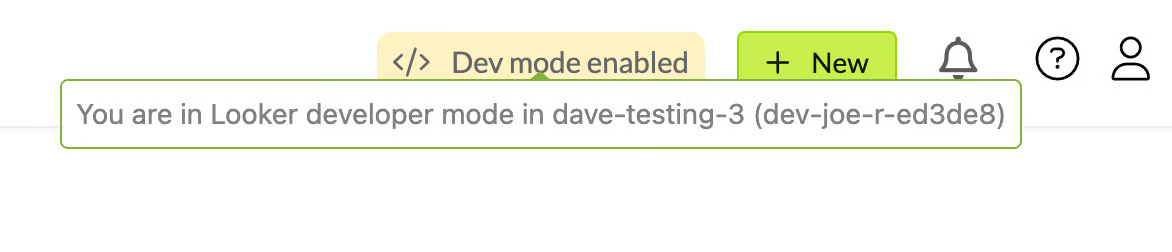
Once enabled, a Dev mode enabled badge will appear in the top navigation bar of the Daasity app. You can hover over this badge at any time to verify which account and Git branch you are currently working on.
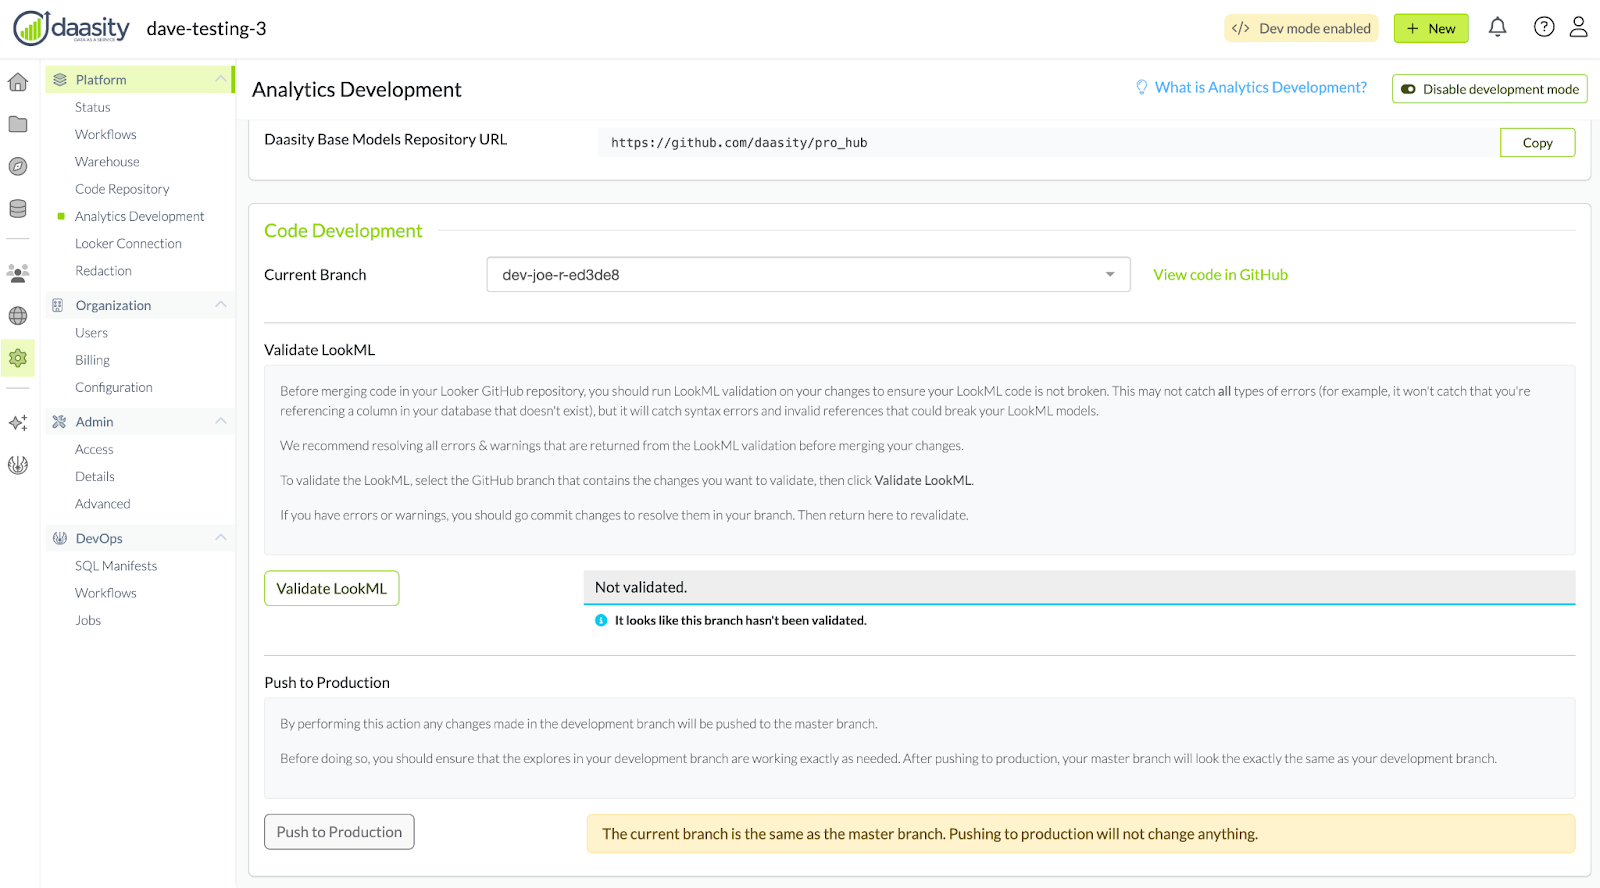
The Analytics Development UI will display a new section which includes all the development actions the user will perform during the development lifecycle: Select a branch to work on (default selection will be your personal branch) with a link to open GitHub with the current session branch, Validate the selected current session branch, Deploy current session branch to production (master branch), and Reset a current session branch to production (master branch).

3. Select Your Development Branch

In the "Code Development" section, click the drop-down menu next to the "Current Branch"

circle-exclamation

4. Modify and Sync Code (External)

triangle-exclamation

A) Modify Code: Scroll to the Looker Code Repository section and click the Looker Repository URL. This opens your "Merchant Spoke" project in GitHub.

B) Sync: You must Commit and Push your changes in GitHub to the same branch you selected in Step 3.

4. Validate LookML

After pushing your code changes to GitHub, return to Daasity and click Validate LookML.

circle-info

When the user performs the Validate LookML action, a background job runs to validate the LookML of the current branch. The system will check for syntax errors. This may take up to 6 minutes to complete.

While a validation action is running, the app UI will:

  • disable the Validate LookML action until it is complete

  • disable the Push to Production action until it is complete

  • automatically update when the refresh is complete

circle-exclamation

The UI will also display the last set of validation results. The possible statuses are:

  • not validated

  • no errors

  • some errors / warnings

See examples below:

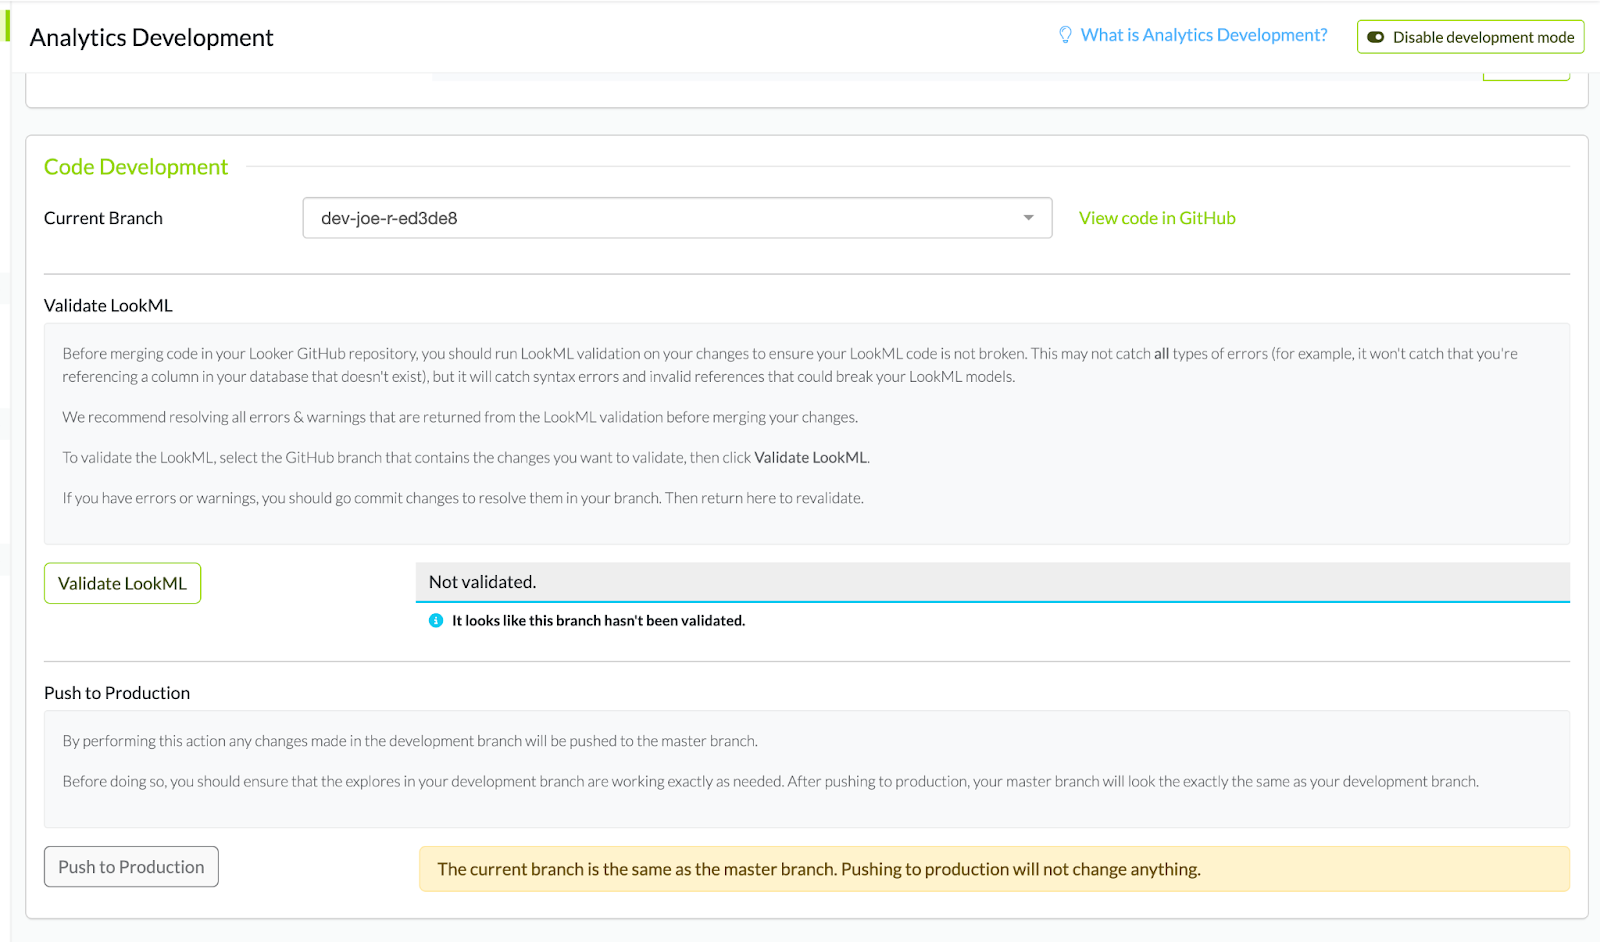
An example of the current branch that has not been validated.
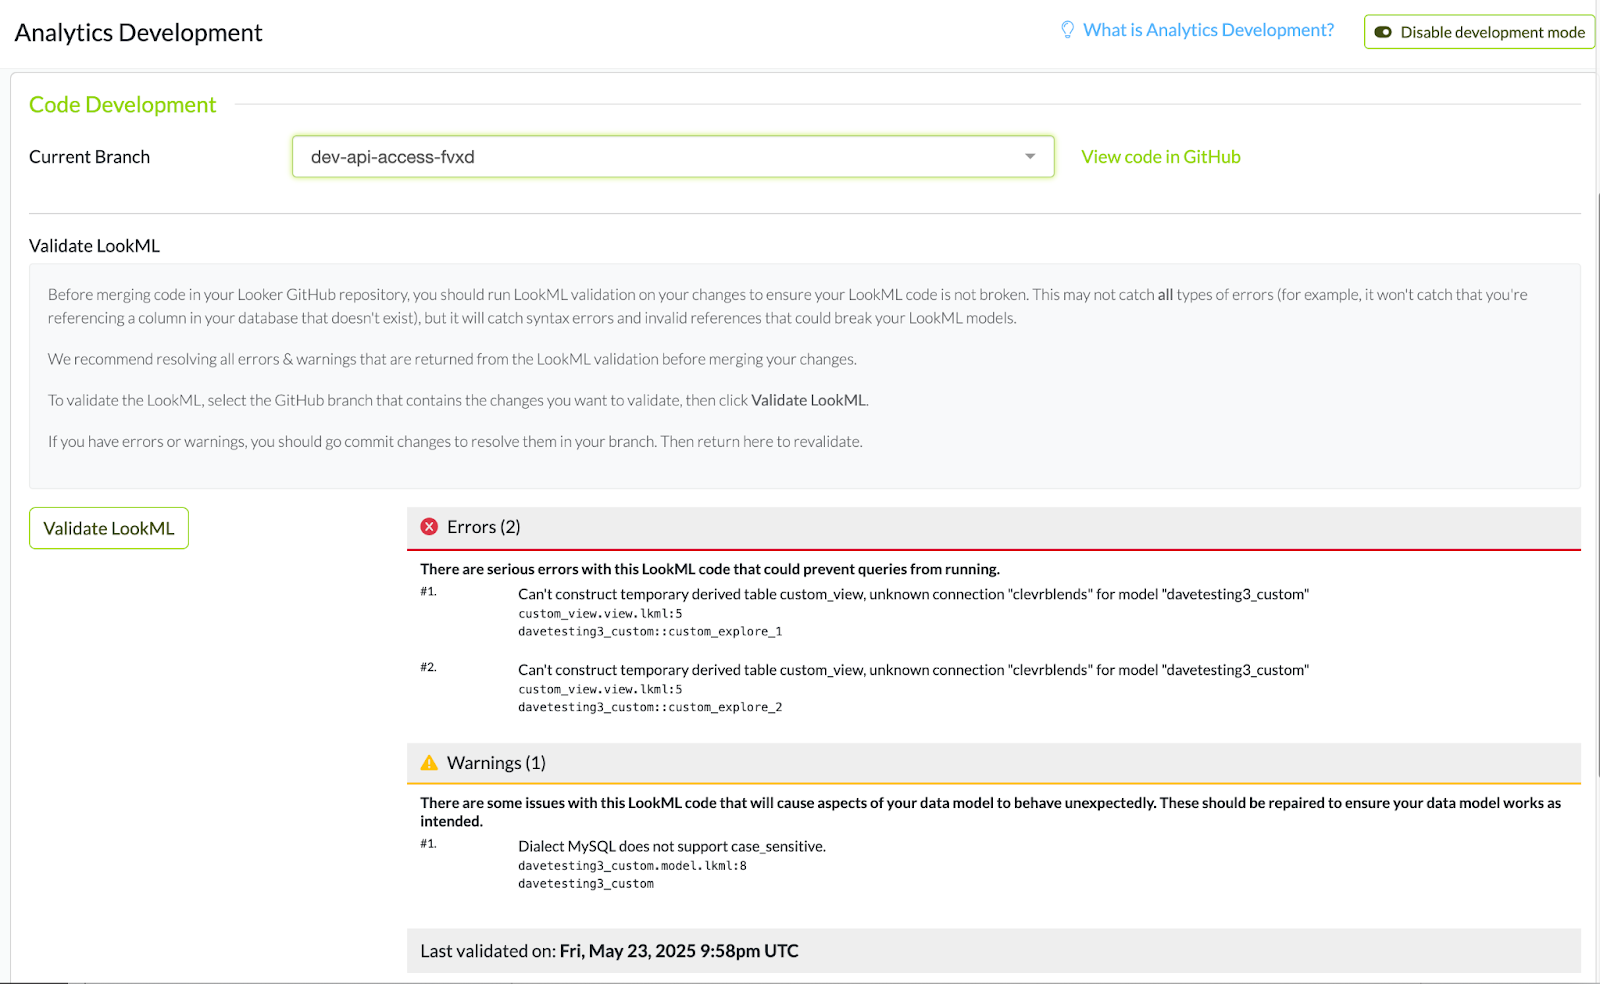
In this example the branch has errors and warnings.
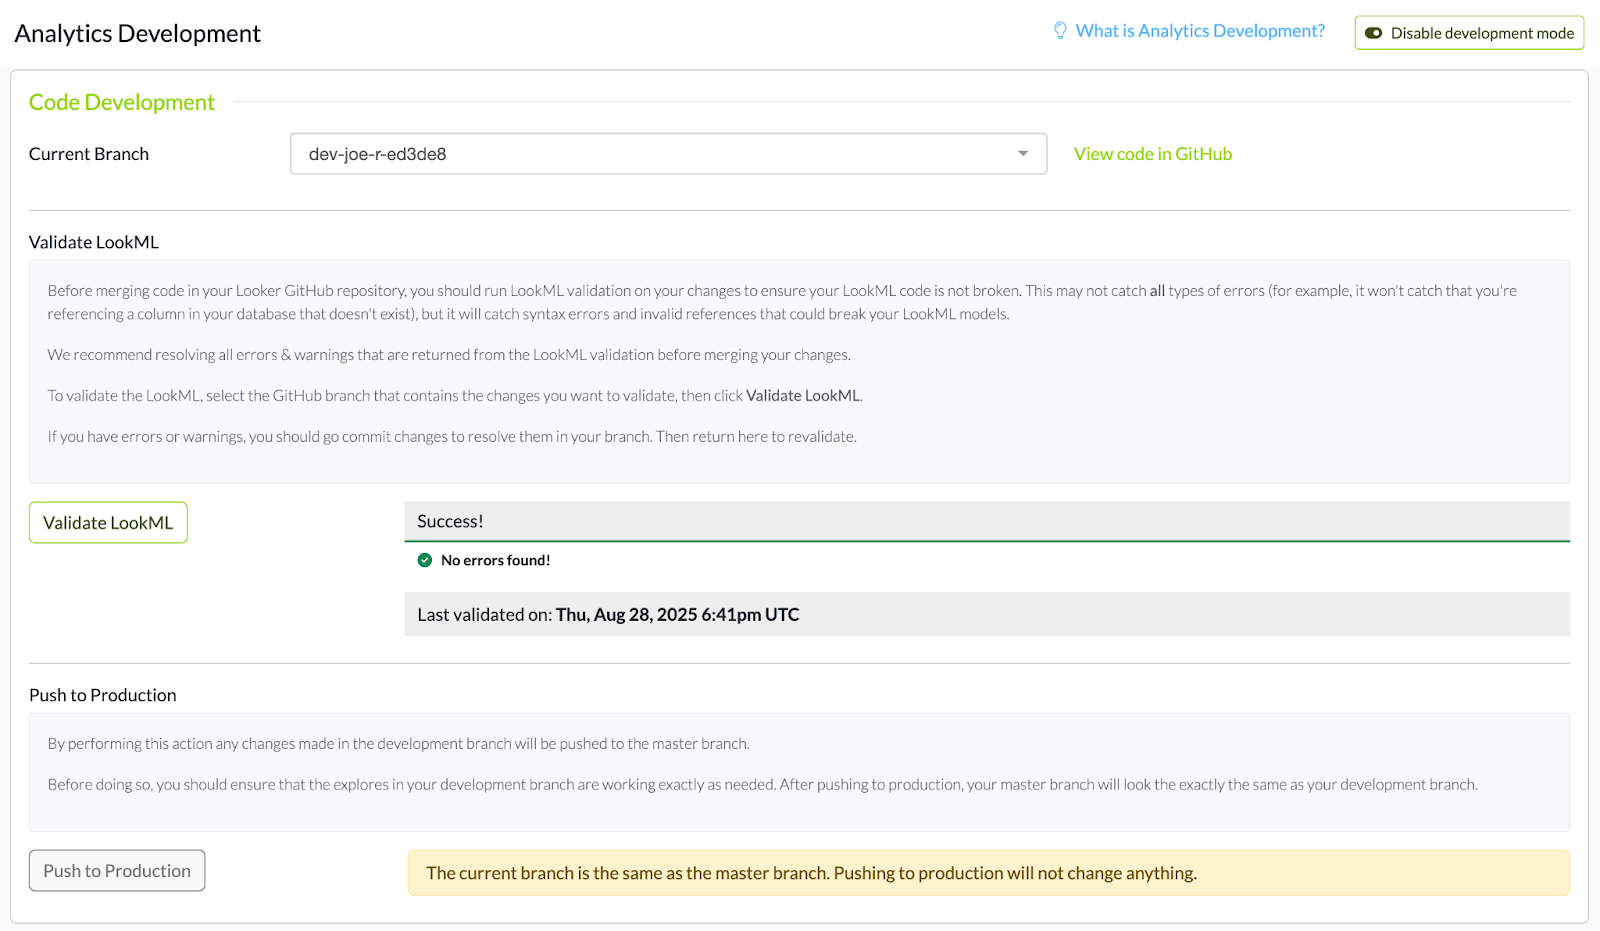
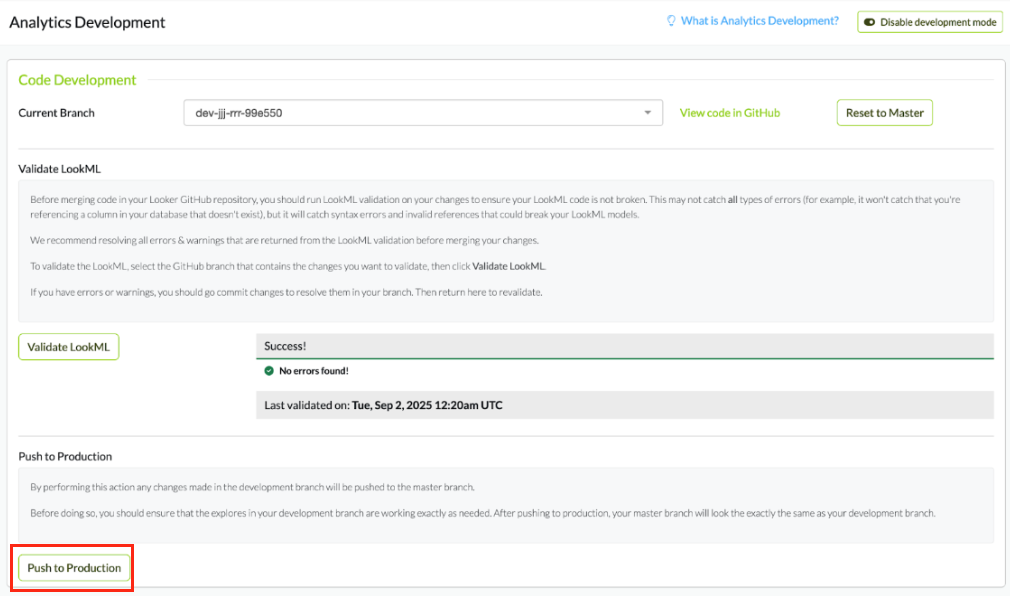
An example of the validation completion without any errors. In this example the branch is the same as production, so the option to Push to Production is disabled.
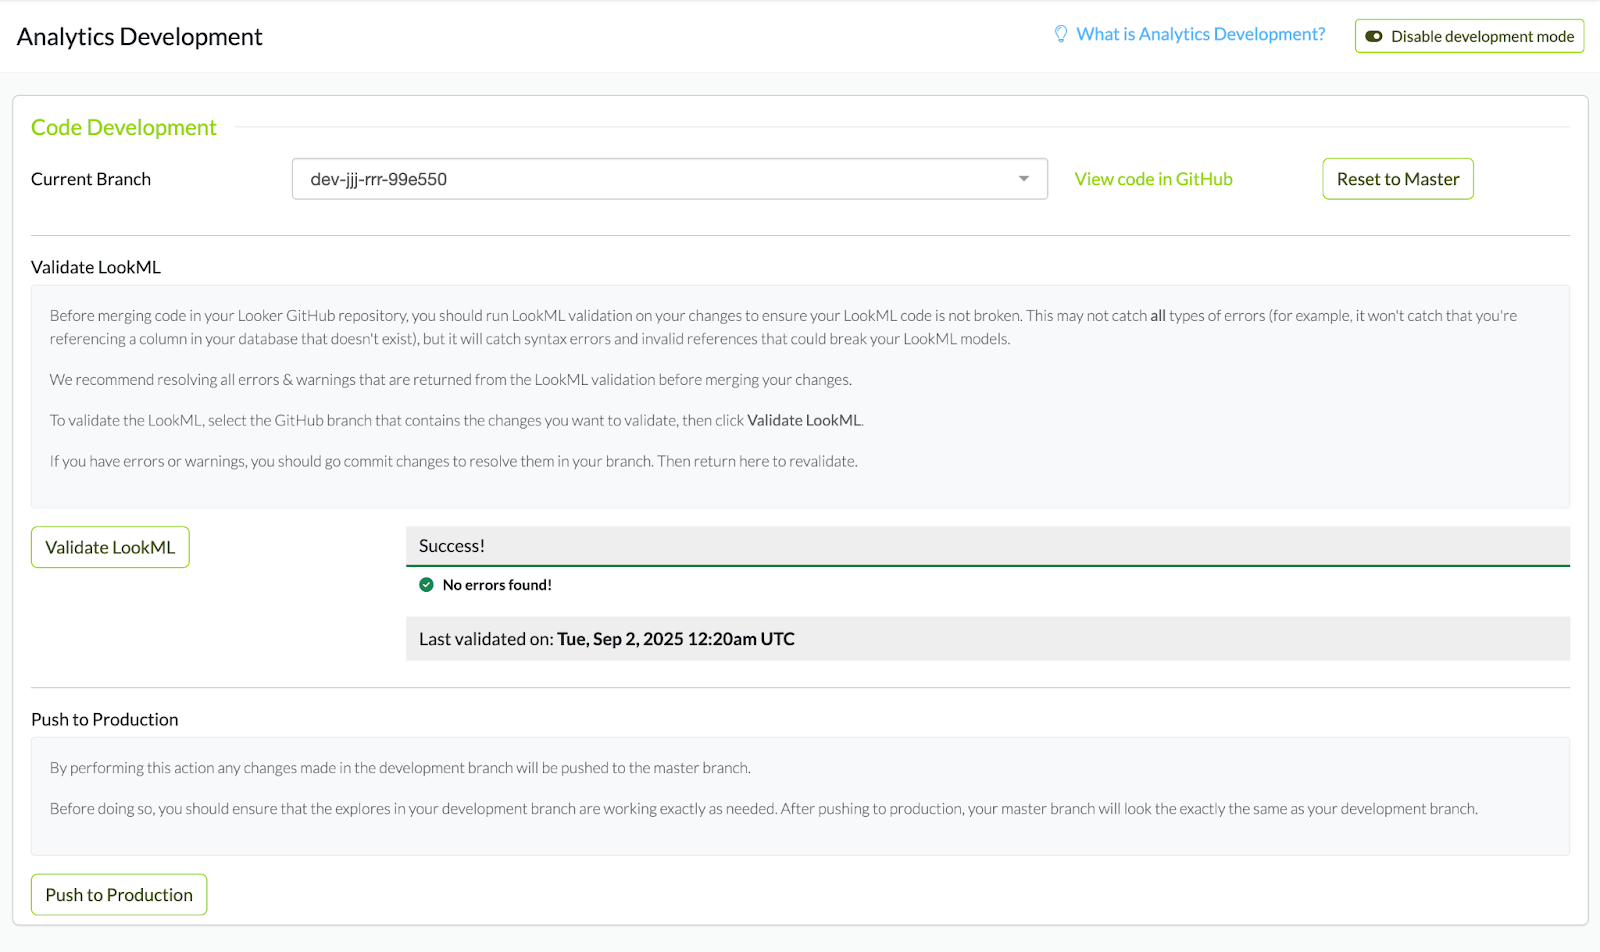
An example of a branch without any errors and is different from production. You will notice the option to Reset to Master is available and that the Push to Production is enabled as well.

5. Test in the Development UI

Before going live, navigate to the Explore section. You will see a Development Data Models tab. This is your staging environment where you can run queries against your new models.

6. Push to Production

Once validated and tested, return to the Analytics Development page and click Push to Production. This merges your changes into the master branch, making them live for all users.

After pushing to Production, the models you built and tested in development will now appear there as shown below.

Last updated

Was this helpful?