# Integration Setup

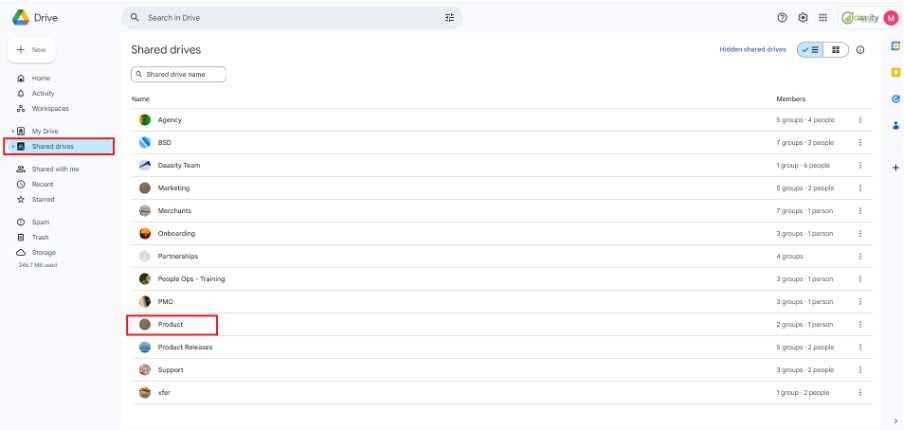
Step 1: Open Google Drive.\ <br>

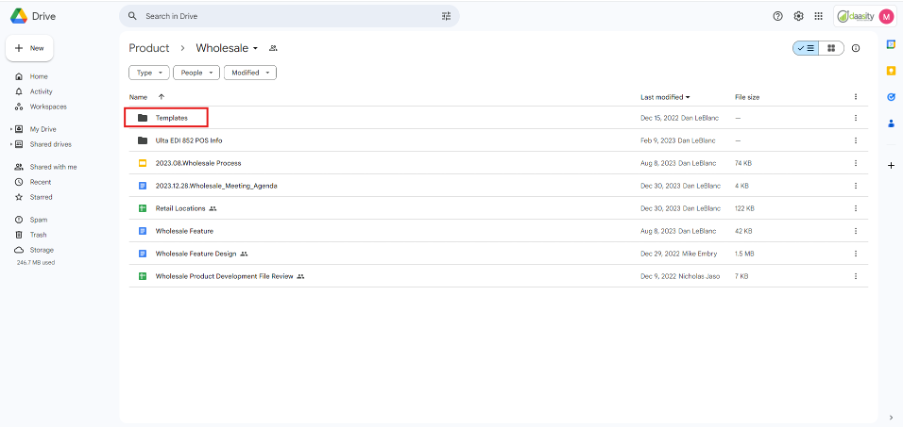
* &#x20; Select Shared drives - Product

<figure><img src="/files/H3TDddE46T0ede4g27CF" alt=""><figcaption></figcaption></figure>

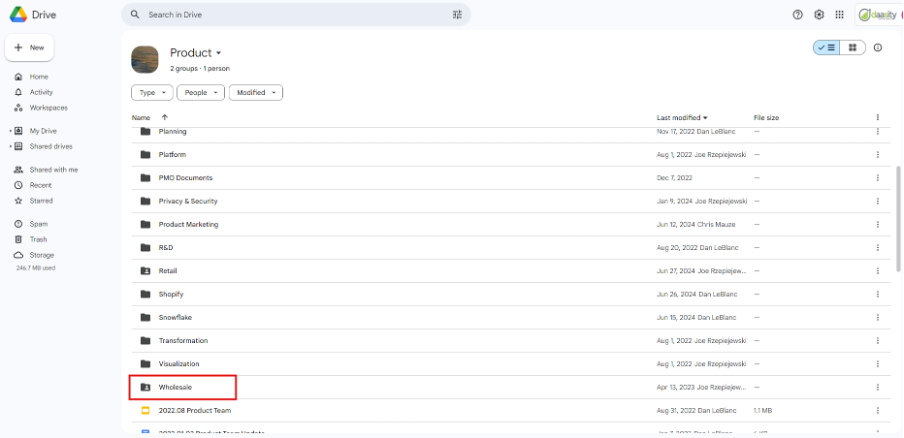
• Click product and Select Wholesale&#x20;

<figure><img src="/files/SNxKw1ls7MzQhhElDtGP" alt=""><figcaption></figcaption></figure>

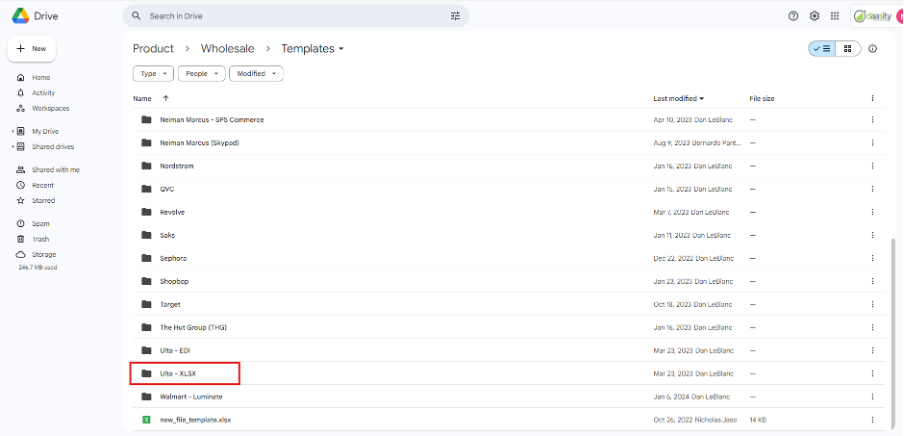
&#x20;• Click Wholesale select Templates

<figure><img src="/files/wGYiAgGHFZTPOsDjIFzU" alt=""><figcaption></figcaption></figure>

&#x20;

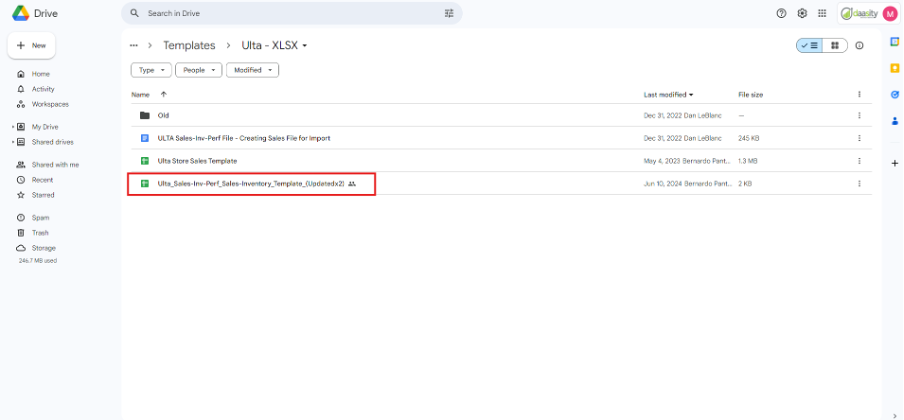
&#x20;• Click Templates and Select - Ulta – XLSX

<figure><img src="/files/enrz8lx8NGT2LuWTwwRR" alt=""><figcaption></figcaption></figure>

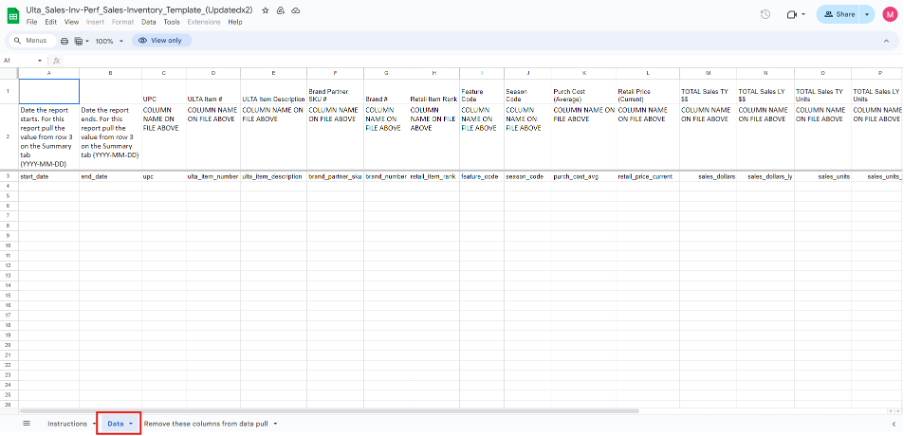
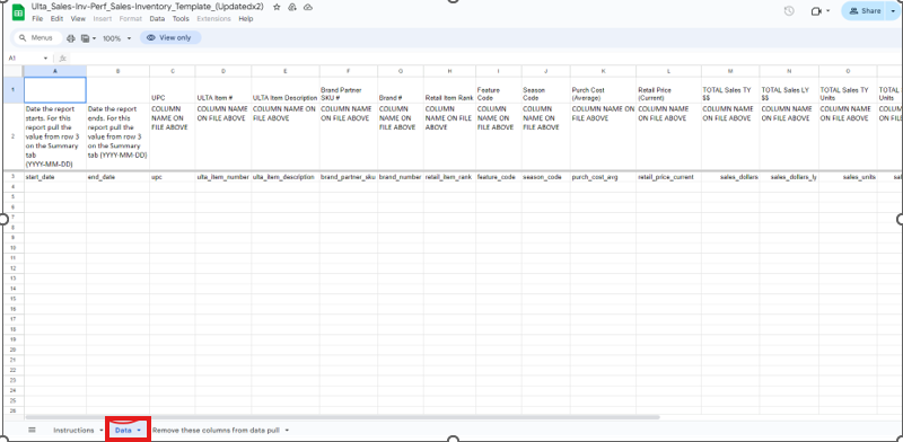
&#x20;• Under Ulta – XLSX select Ulta\_Sales-Inv-Perf\_Sales-Inventory\_Template\_(Updatedx2)

<figure><img src="/files/zPEZC6UkHuOC3cchV9vB" alt=""><figcaption></figcaption></figure>

&#x20;• Click on Data

<figure><img src="/files/32V2Wtz2VWwyi9OuwnFj" alt=""><figcaption></figcaption></figure>

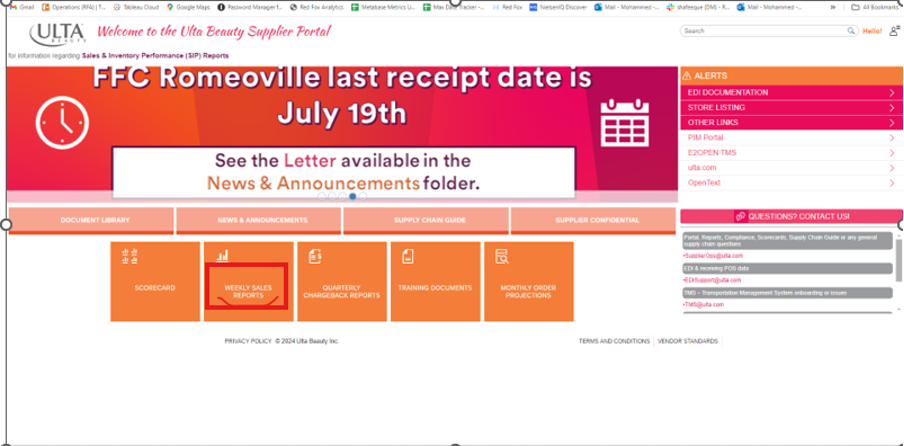
&#x20;Step 2: Click on the below link and sign in with the credentials to ULTA Portal.

<https://supplierportal.ultabeauty.com/sites#landingpage-Display>

&#x20;    Username: <ulta@empathy-beauty.com>

&#x20;    PW: \*May022024

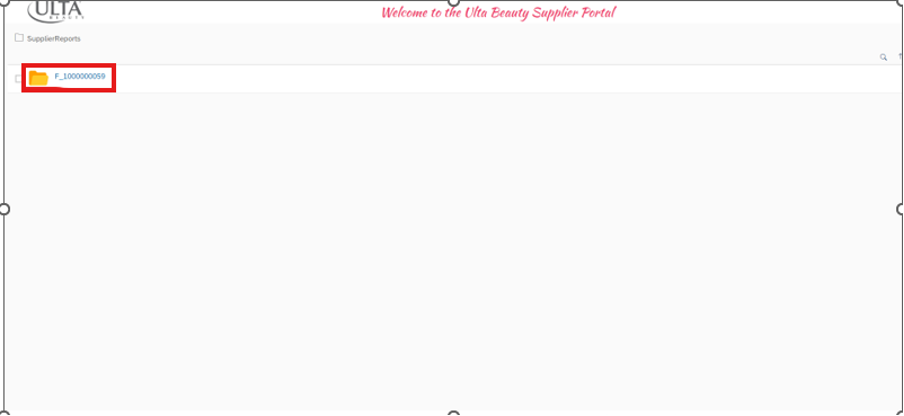
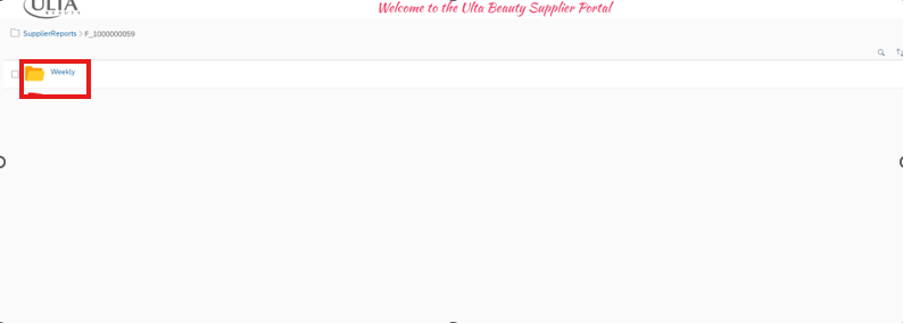
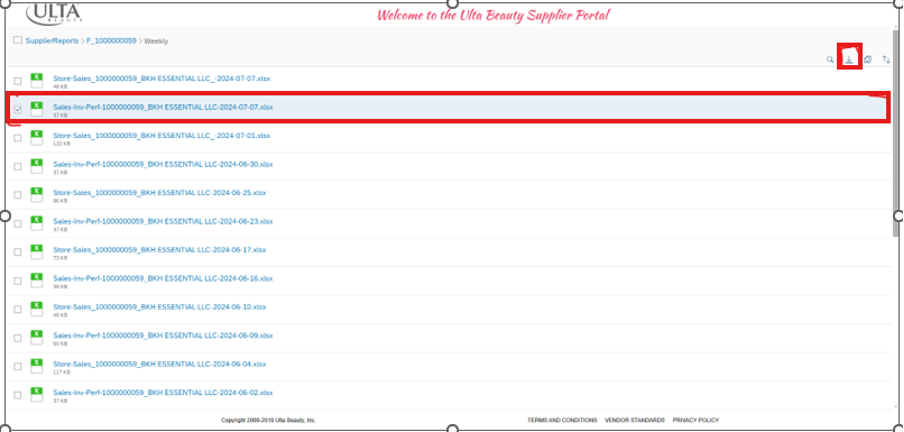
Select Weekly Sales report and continue as in the below images

<figure><img src="/files/zrMIiDkKjpotedACUsJ3" alt=""><figcaption></figcaption></figure>

&#x20;

<figure><img src="/files/nbYKf3S3RYJWhhKdOfo0" alt=""><figcaption></figcaption></figure>

&#x20;

<figure><img src="/files/elxYs0StDqaO6jj6axcQ" alt=""><figcaption></figcaption></figure>

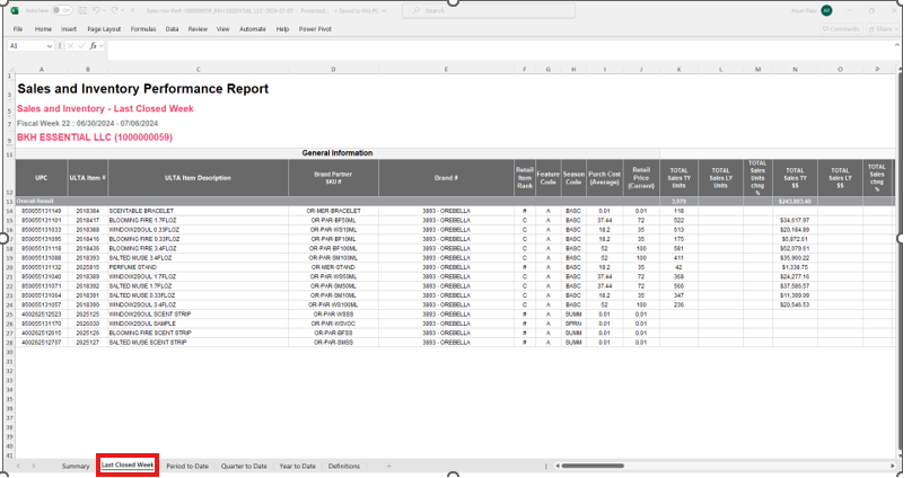
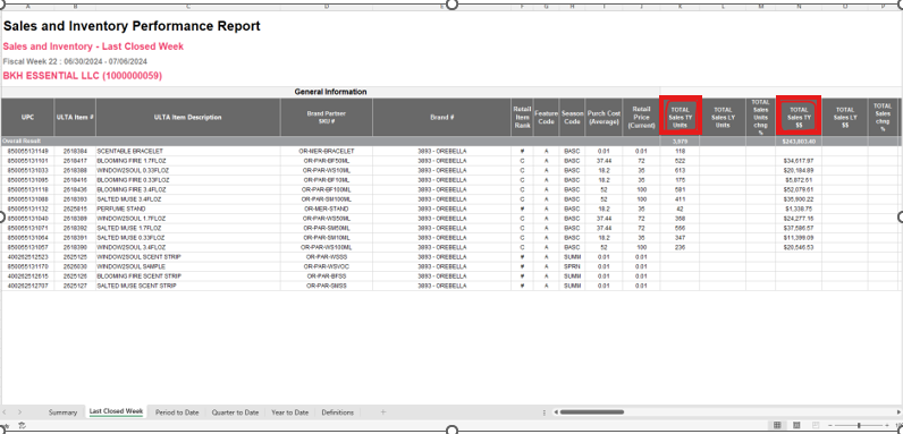
• Select Latest Sales-Inv-Perf files, Download and save in the desired location

<figure><img src="/files/I3KfQ26D7Wv09uU85LhN" alt=""><figcaption></figcaption></figure>

• Open the file and select the Last Closed Week

&#x20;

<figure><img src="/files/wp9V0VocEEhOXLA770pF" alt=""><figcaption></figcaption></figure>

&#x20;

&#x20;**Step 3: Continue with the Step 1.**

• Make a Copy of the previously Opened file

<figure><img src="/files/JUOJ4eq3aKY3RjiCi5nR" alt=""><figcaption></figcaption></figure>

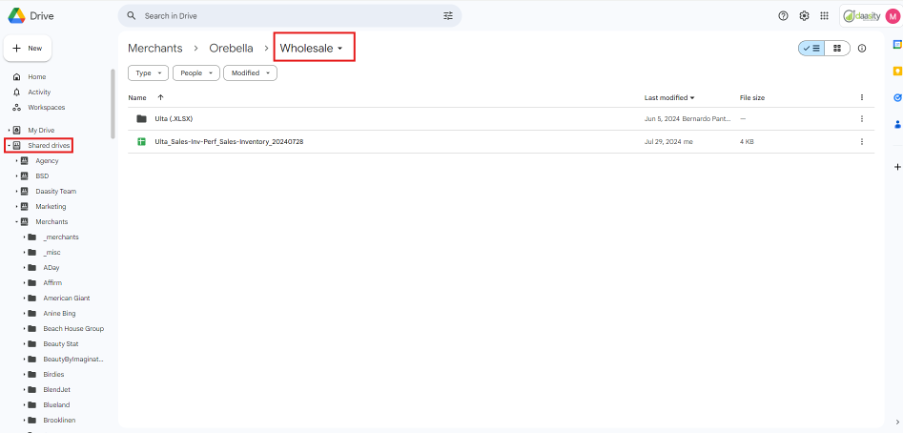
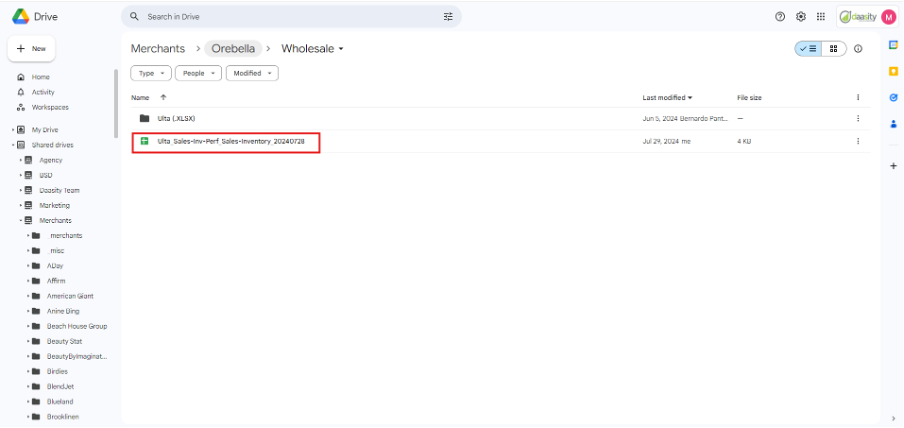
* Make a copy and save in the below path

Shared drives – Merchants – Orebella – Wholesale – Ultra (XLSX) – Save with the same file name with the previous day date( If we are doing on Monday save on Sunday date)

&#x20;

<figure><img src="/files/Q5g2mlYcsxXYVikBfuVM" alt=""><figcaption></figcaption></figure>

<figure><img src="/files/DUlL6cd7pto0fw7zW9cA" alt=""><figcaption></figcaption></figure>

&#x20;&#x20;

* Copy the Data from the portal and paste in the latest files which we saved above

<figure><img src="/files/C6O72tpCt3oWhKTw9uTM" alt=""><figcaption></figcaption></figure>

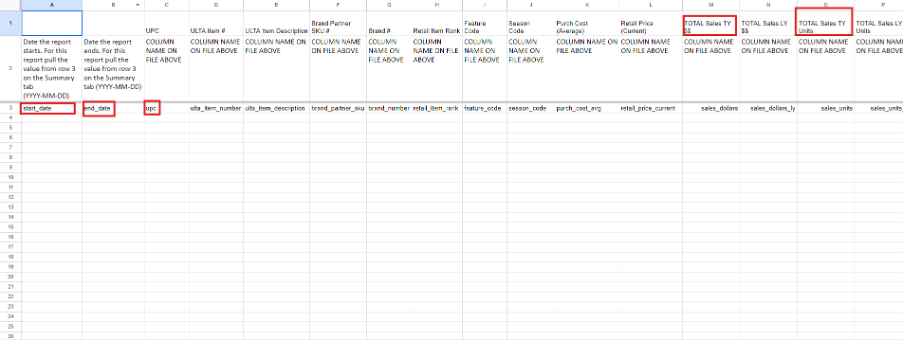
* Start Date – Sunday
* &#x20;End Date – Saturday
* &#x20;Copy From UPC to Retail price Current
* &#x20;Check The Row headings and copy data from ULTA portal to G sheet

<figure><img src="/files/IwIPWLpaFS3zMo1IfRyu" alt=""><figcaption></figcaption></figure>

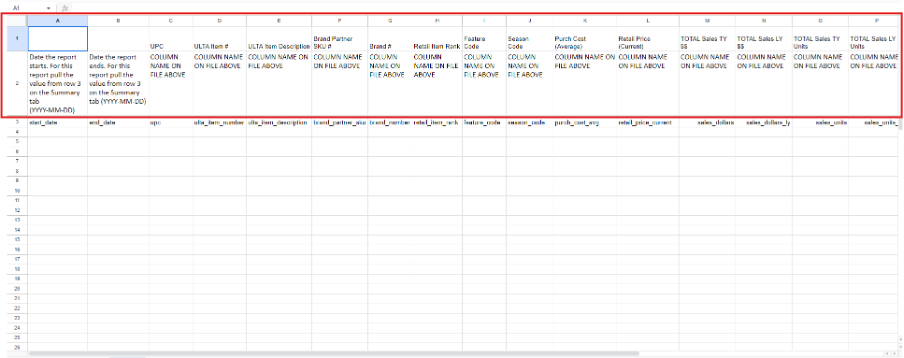
• Once Data is copied to the G sheet remove the Reference Rows 1 and 2

&#x20;

<figure><img src="/files/kHf34oXchiuTpmqjqwoF" alt=""><figcaption></figcaption></figure>

&#x20;

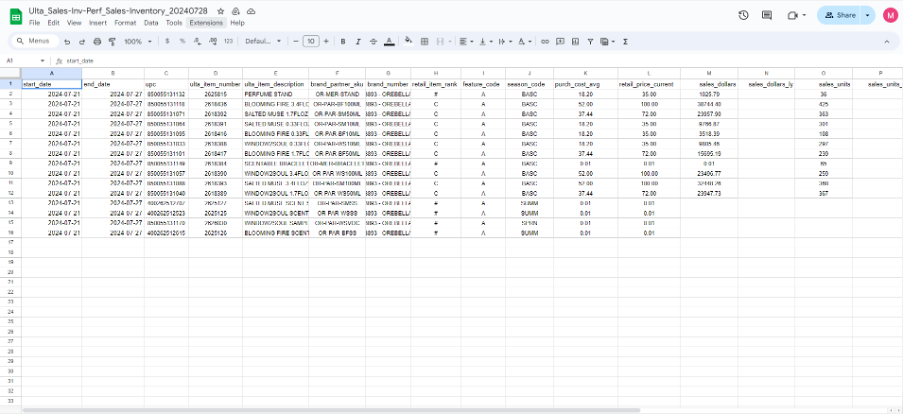
* Once all the details are entered as below, download the file and save it in the desired location.

<figure><img src="/files/BFLjxplrcz9ZEZydl4yR" alt=""><figcaption></figcaption></figure>

&#x20;**• Step 4: Add the saved file to S3**

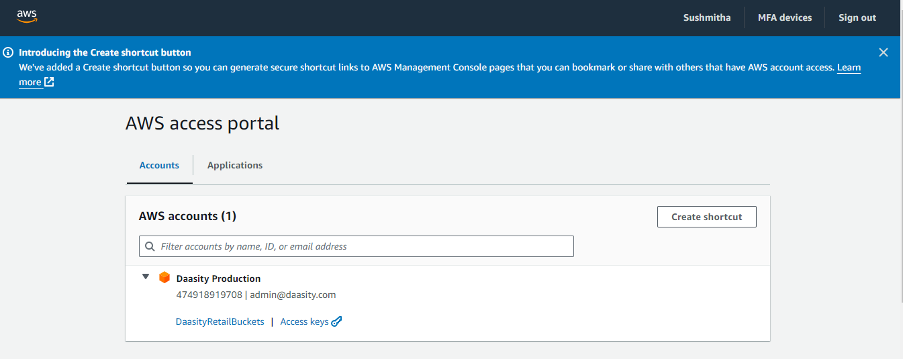
* Login to AWS Access Portal

{% embed url="<https://daasity.awsapps.com/start/>" %}

&#x20;

<figure><img src="/files/tfJtDGmHObsfifB0MLR1" alt=""><figcaption></figcaption></figure>

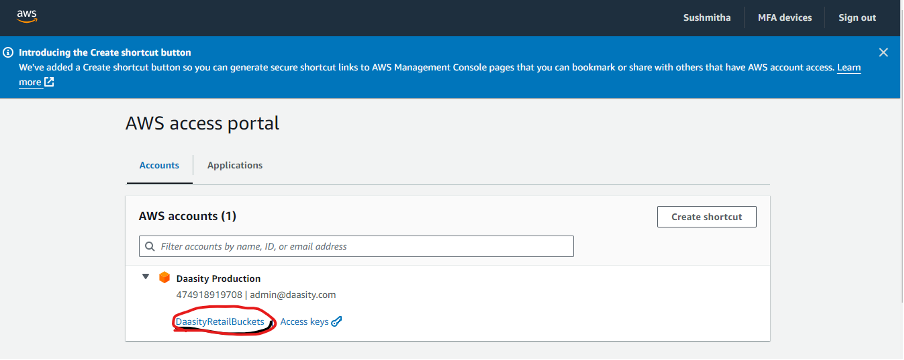
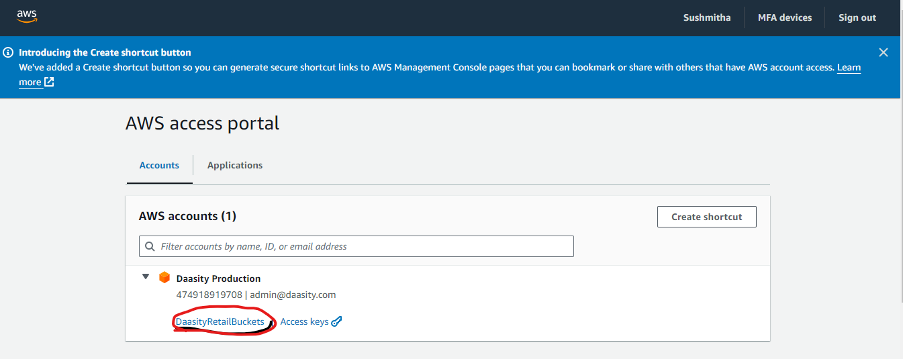
&#x20;• Click on Daasity Retail Buckets

<figure><img src="/files/ZPoRHL4hqoRqvU1VOlaI" alt=""><figcaption></figcaption></figure>

&#x20;• Click on S3

<figure><img src="/files/Z7jxwn9u44DzMwwN8zt6" alt=""><figcaption></figcaption></figure>

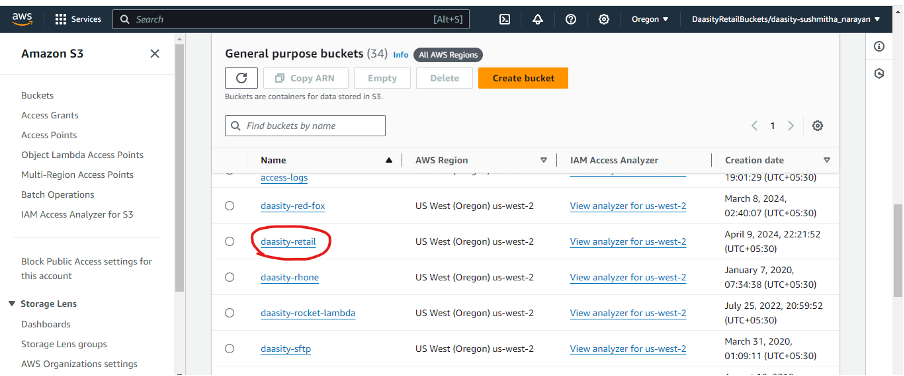
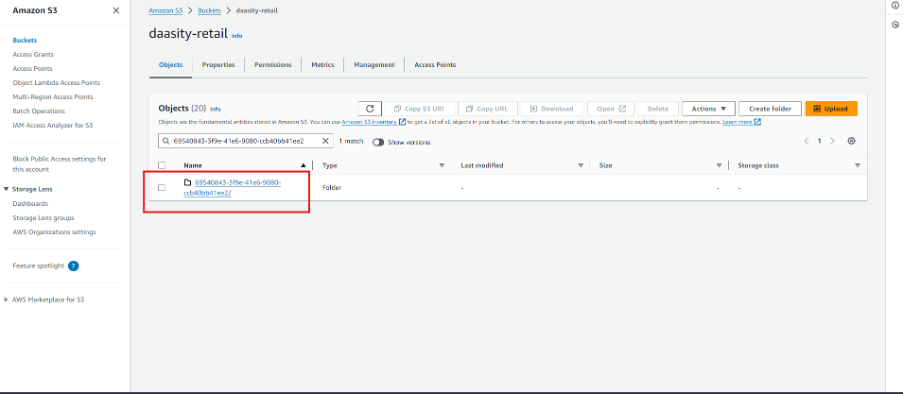
&#x20;• Click on Daasity Retail

<figure><img src="/files/tPu2sO7HAHepCvgGS9lw" alt=""><figcaption></figcaption></figure>

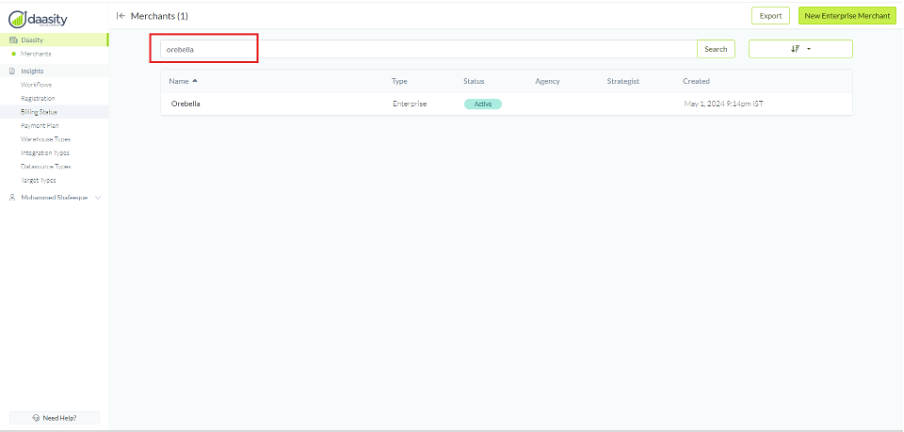
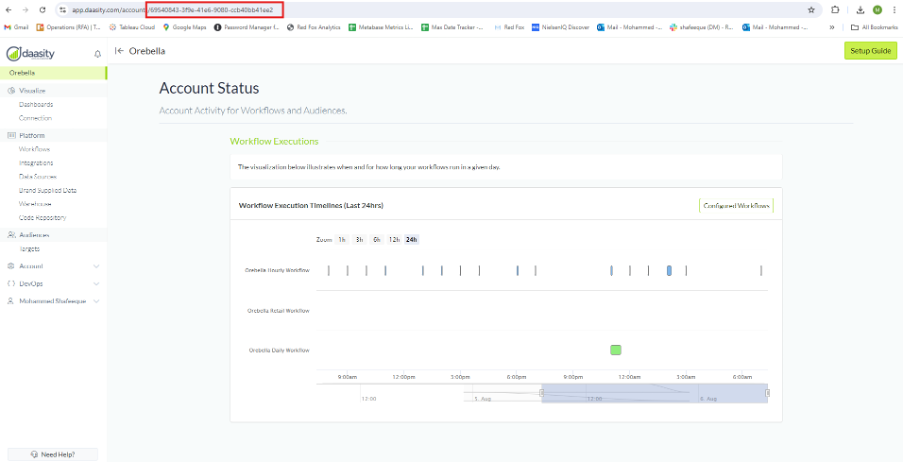
&#x20;• Open Daasity App and search the client Name

<figure><img src="/files/zDPh5o3aB8OZ8MHf74uA" alt=""><figcaption></figcaption></figure>

&#x20;• Copy the code

<figure><img src="/files/bGn0TVHq04EiszPBzeWt" alt=""><figcaption></figcaption></figure>

&#x20;• paste in Daasity Retail and Click on the folder

<figure><img src="/files/EGPOPZvQ46H48oFEyIRl" alt=""><figcaption></figcaption></figure>

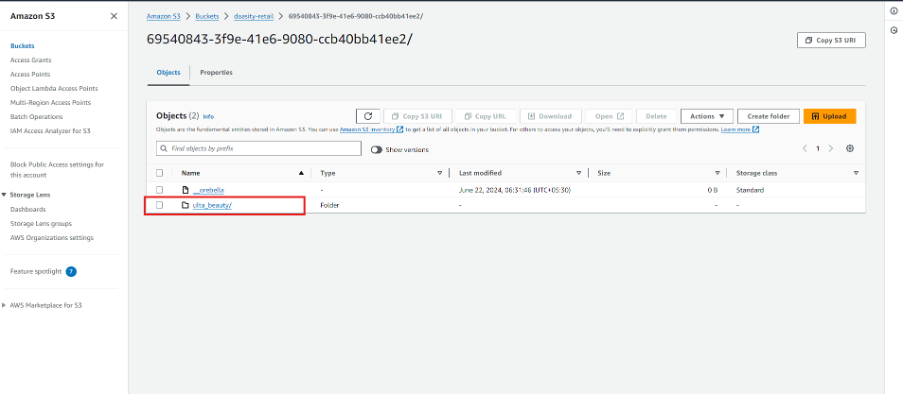
&#x20;• Click ULTA Beauty

<figure><img src="/files/SmBwbPLSvnwbeZBbs3HT" alt=""><figcaption></figcaption></figure>

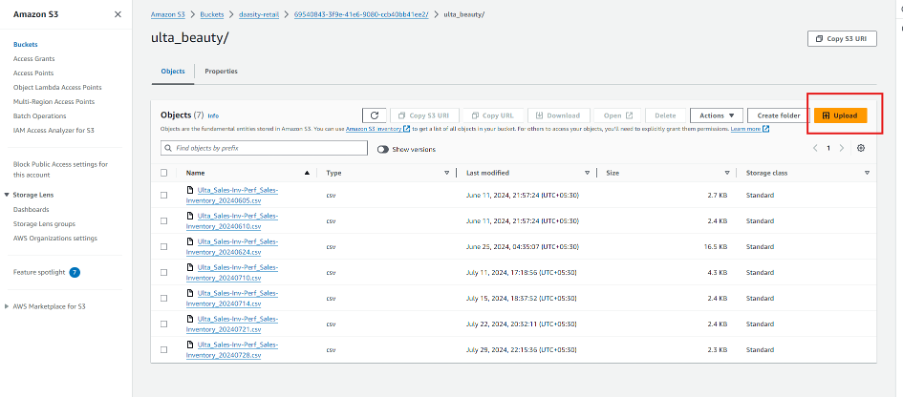
&#x20;• Click on Upload

<figure><img src="/files/5qvW5d91upCCGTqh12sz" alt=""><figcaption></figcaption></figure>

* Go to Dropbox- Drag and drop the required client file

* Click on upload

* &#x20;**Step 5:Integration**

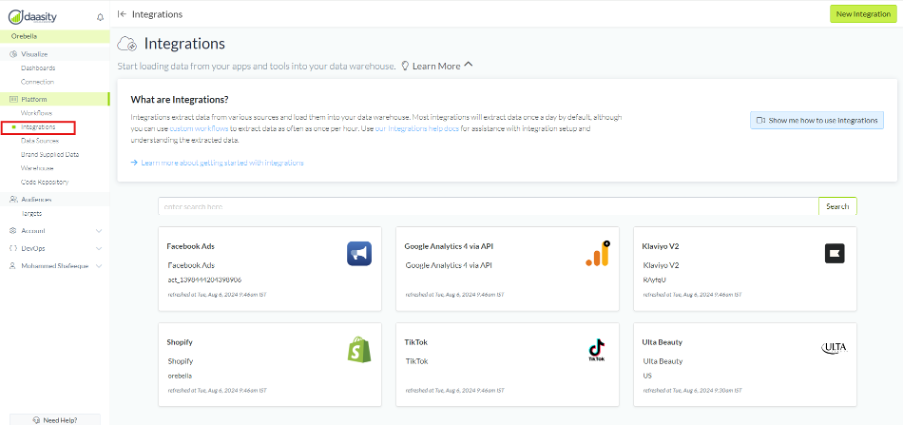
* &#x20; Switch to Daasity app and select Integration

<figure><img src="/files/oQWQPv0wMMu8eVzcfsto" alt=""><figcaption></figcaption></figure>

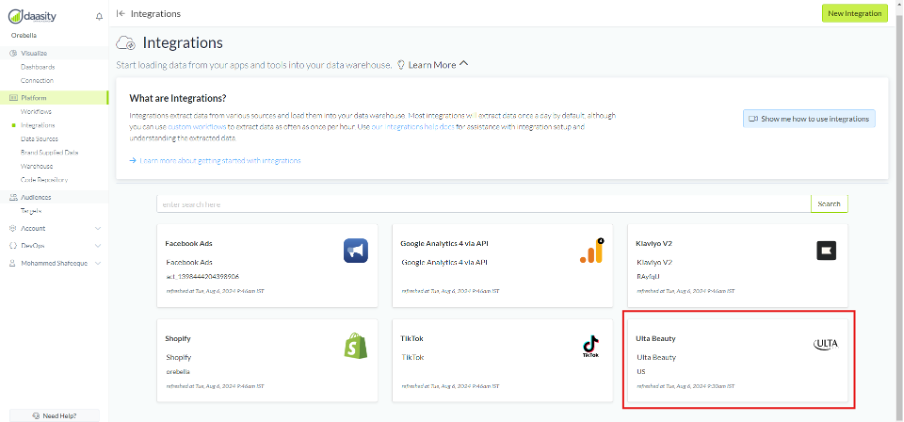
• Click on Ulta Beauty

<figure><img src="/files/nbyGo7MrpKc61ya7C1Mj" alt=""><figcaption></figcaption></figure>

&#x20;

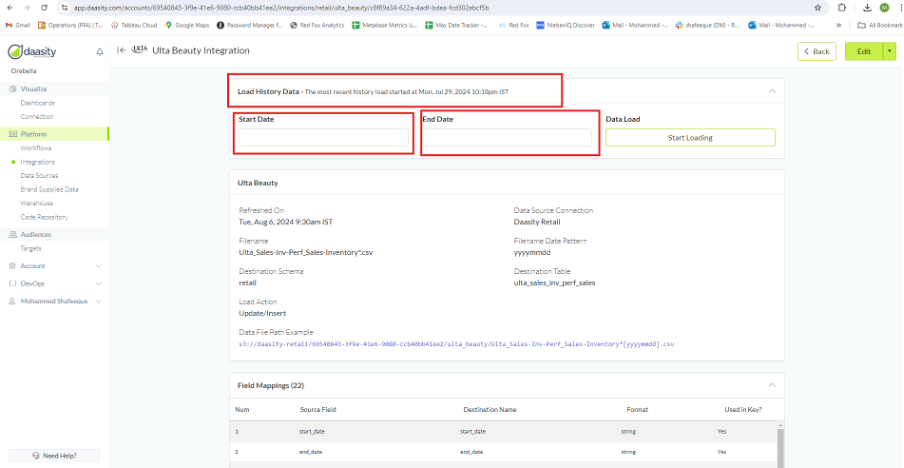
* ⠀Click on Load History Data and Select Start date and End date as per the file saved in dropbox – Then Click StartLoading
<figure><img src="/files/xeUtUYmTF2odiEKEU8Zn" alt=""><figcaption></figcaption></figure>


---

# Agent Instructions: Querying This Documentation

If you need additional information that is not directly available in this page, you can query the documentation dynamically by asking a question.

Perform an HTTP GET request on the current page URL with the `ask` query parameter:

```
GET https://help.daasity.com/core-concepts/data-integrations/setup-guides/digital-integrations/ulta/integration-setup.md?ask=<question>
```

The question should be specific, self-contained, and written in natural language.
The response will contain a direct answer to the question and relevant excerpts and sources from the documentation.

Use this mechanism when the answer is not explicitly present in the current page, you need clarification or additional context, or you want to retrieve related documentation sections.