> For the complete documentation index, see [llms.txt](https://help.daasity.com/llms.txt). Markdown versions of documentation pages are available by appending `.md` to page URLs; this page is available as [Markdown](https://help.daasity.com/core-concepts/data-integrations/setup-guides/digital-integrations/klaviyo-v2/integration-setup.md).
# Integration Setup
This page will help you setup Klaviyo for the first time, and provide instructions for recurring data updates as needed.
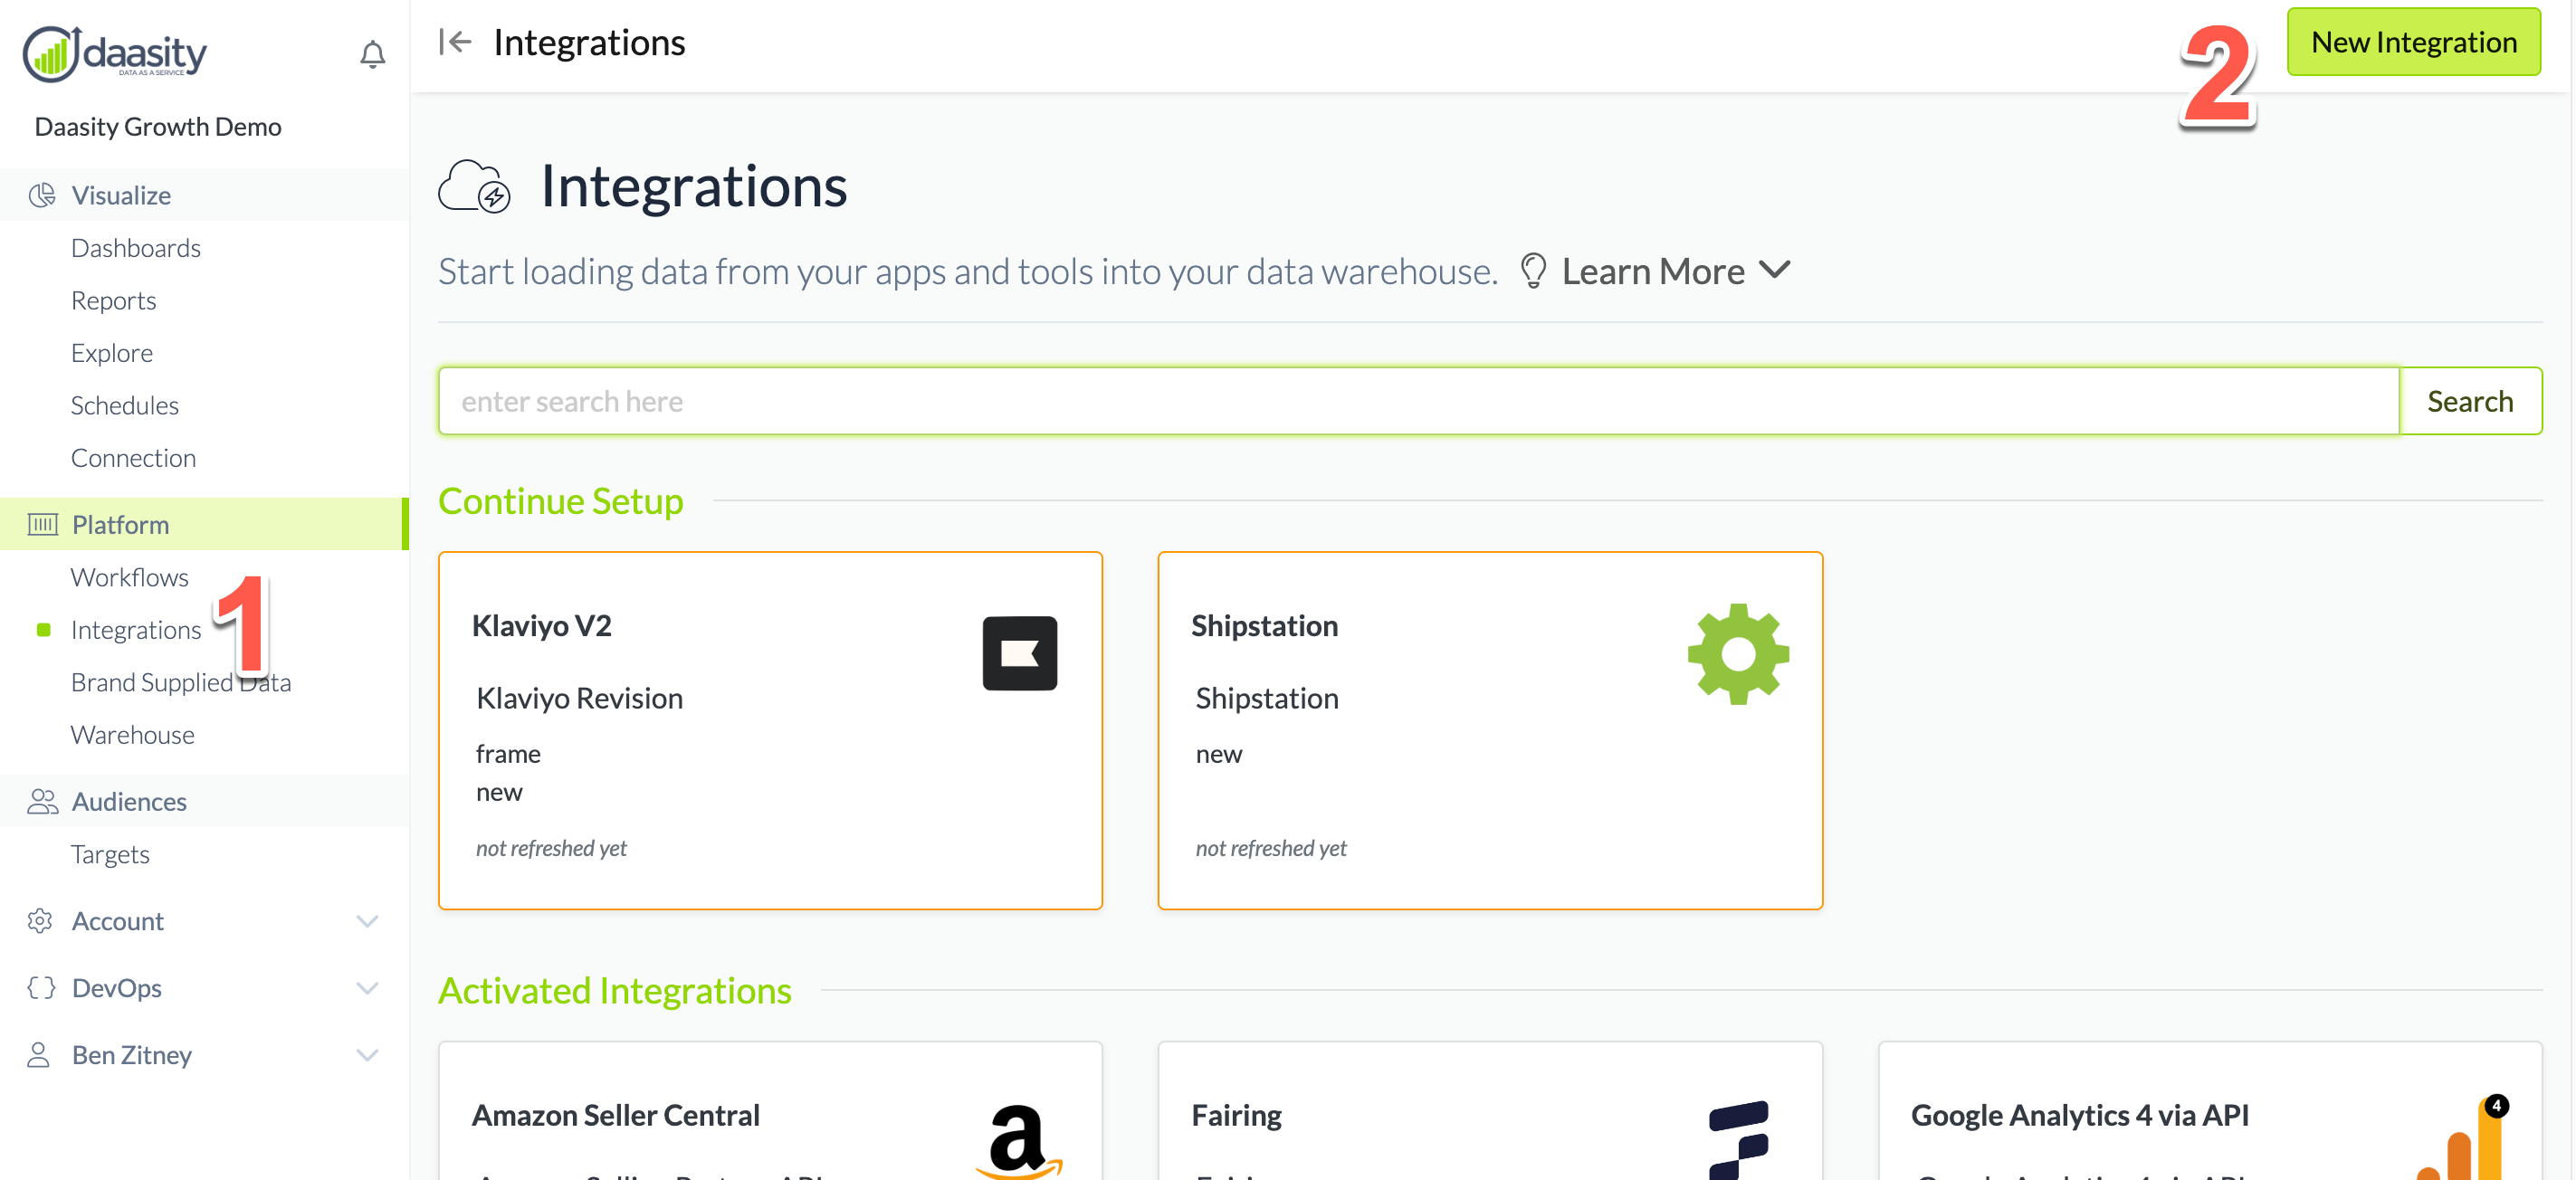
## Step 1: Navigate to 'New Integration' screen
In the Daasity app, click **Integrations** in the left-hand menu, and then the **New Integration** button in the upper-right corner.
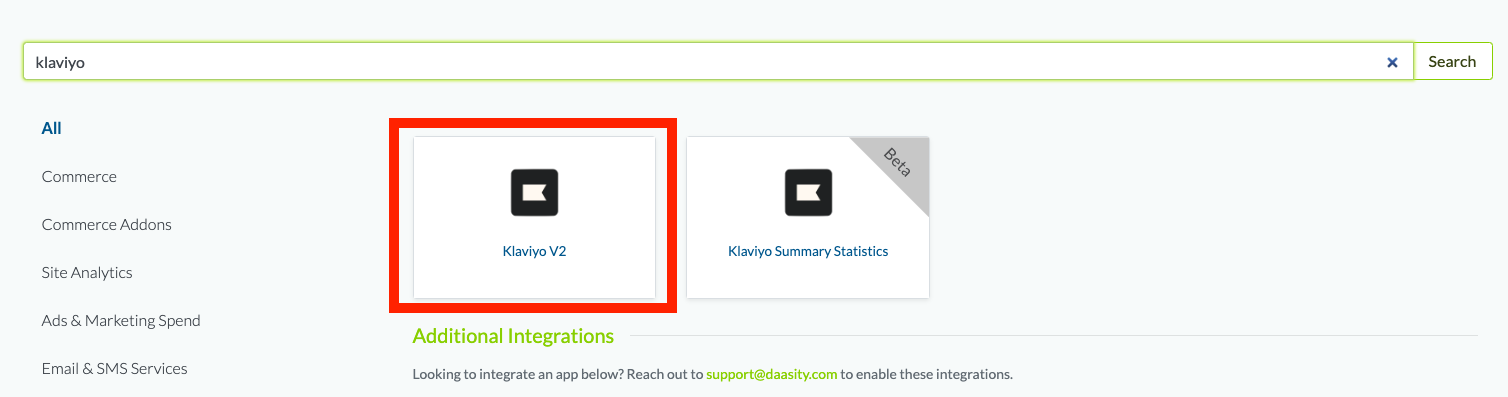
## Step 2: Choose the Klaviyo V2 integration
In the search box, type "klaviyo" and choose the Klaviyo V2 integration.
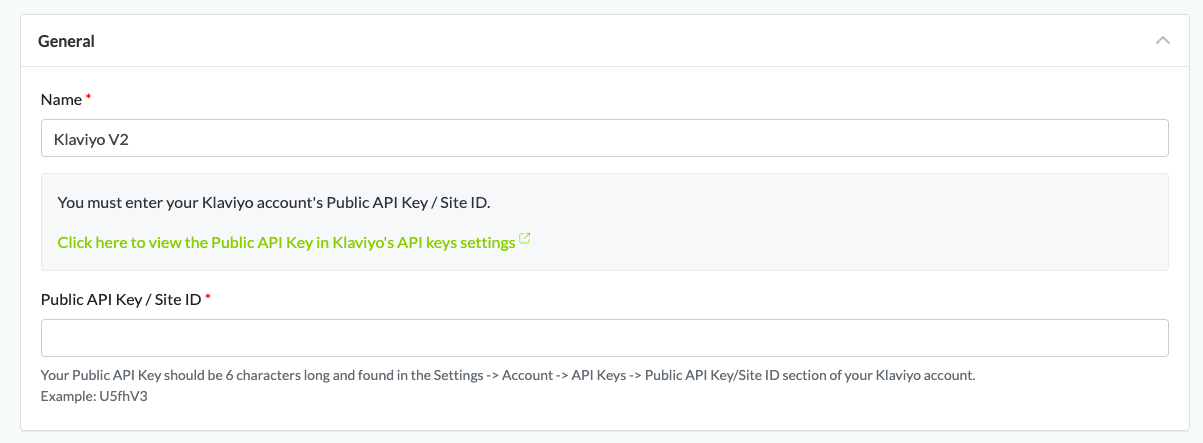
## Step 3: Complete the Setup Screen
Give the integration a name. This is the name that will be displayed in your integrations list in the Daasity app.
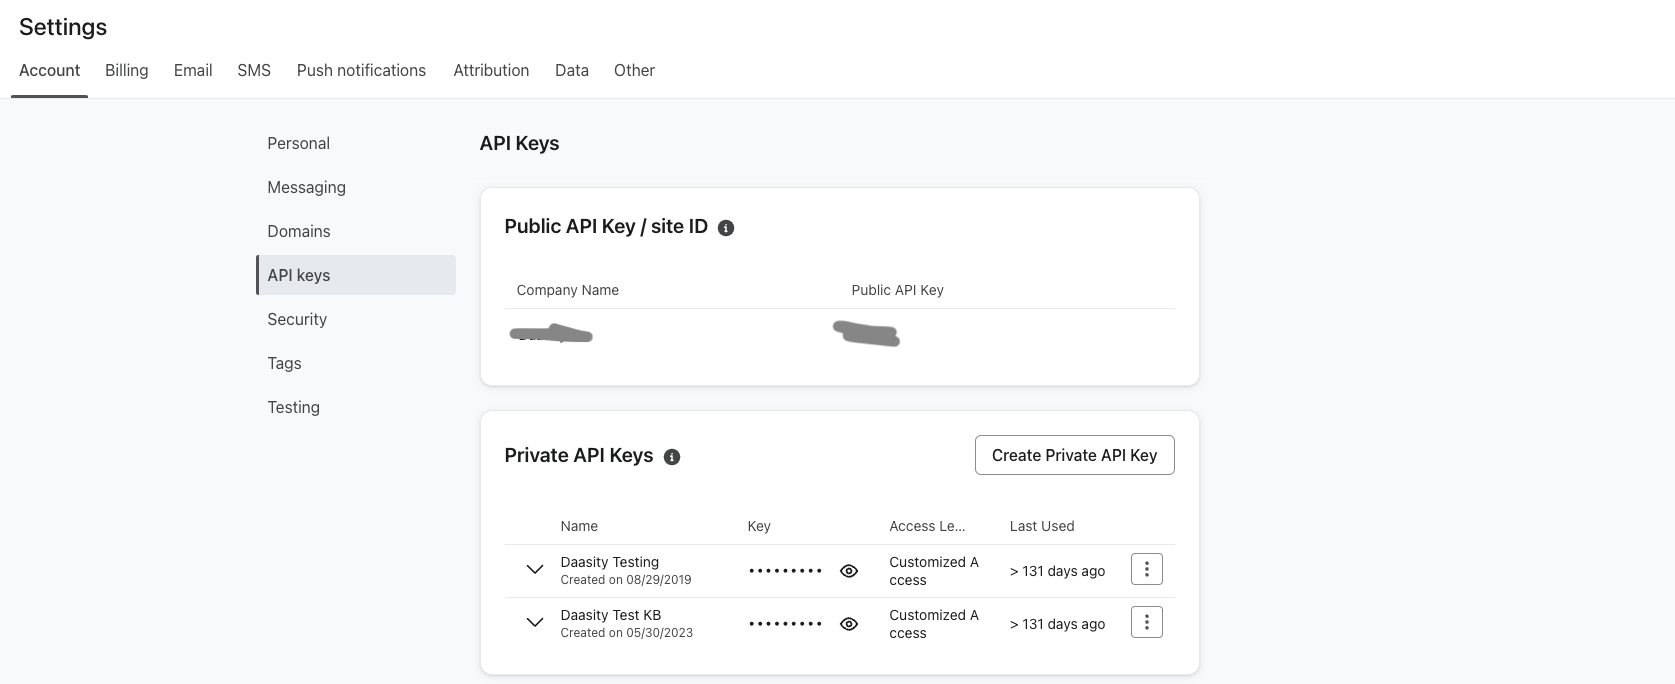
Find the Public API Key / Site ID by following the link that will take you to [this page](https://www.klaviyo.com/settings/account/api-keys) within Klaviyo
The api-keys page should look something like this
## Step 4: Authorize
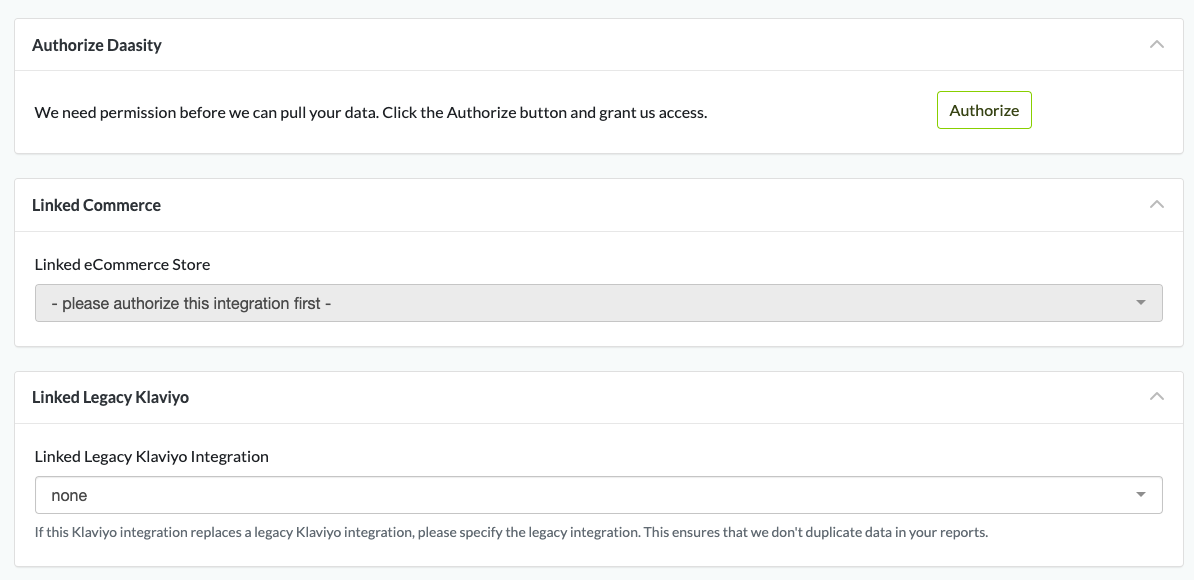
Click on Authorize button.
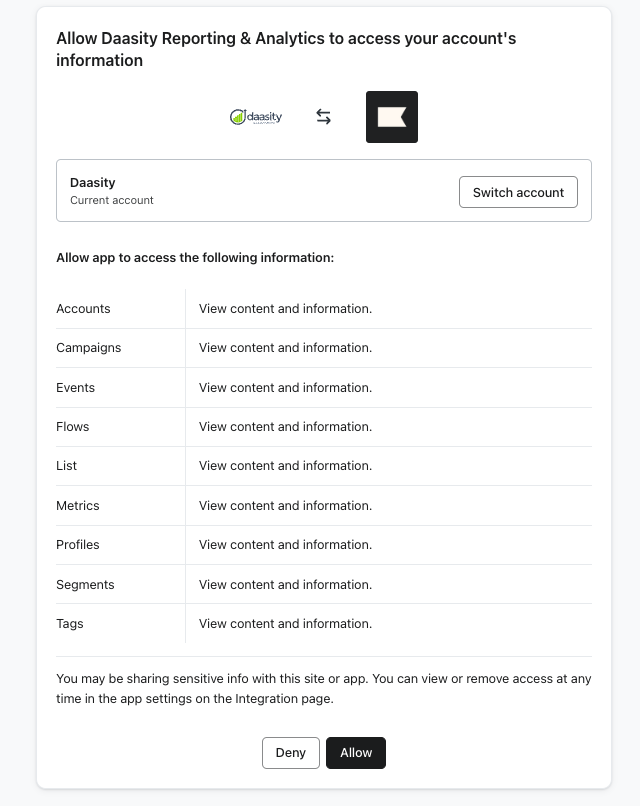
This will re-direct you to Klaviyo asking you to "Allow" Daasity to extract data from Klaviyo. Click on the Allow button
Finally you can optionally link your Klaviyo to an eCommerce store and link to an old Klaviyo integration if you used the original Daasity Klaviyo integration (prior to 2024)
## Step 5: Load history
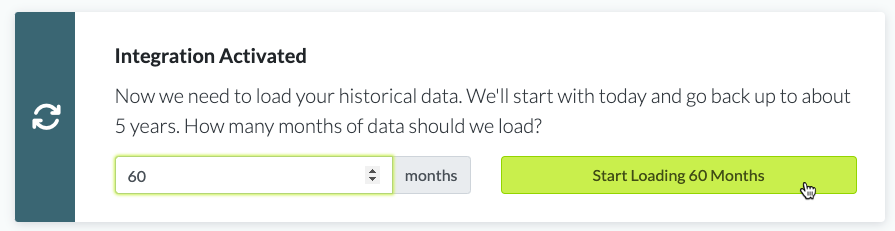
From the integration details screen, trigger a load of up to 5 years of history:
## **Optional: Syncing List Membership**
By default, the Klaviyo V2 integration does not extract list membership. If you want membership for a specific list (e.g., an all-subscribers list) available in your warehouse, contact Daasity Support with the Klaviyo list ID and we can enable it for your integration. Review the [list sync limitations](https://help.daasity.com/core-concepts/data-integrations/setup-guides/digital-integrations/klaviyo-v2/integration-specifications#list-membership-sync-member-lists) first - syncs are slow for large lists and only capture contacts joining a list, not leaving it.